Monday, July 03, 2006

More Cantilever brake setup help


I've posted about this before, but I think its important. Cantilever brakes get a bad rap because people dont know how to set them up. And dont think that taking your bike to your LBS will solve all of your problems----just learn how to do it yourself.

Again, I went to the internet archive and found this series of articles from Keith Bontrager.

Link.

Edit: in case the link isnt working, I saved the info and posted it verbatim here (without pictures):

Unfortunately the pics arent loading, but the information is still good, just long winded. Read some and then come back.


The Background
(How did this happen?)
Cantilever brakes used to come with these nice, simple straddle wire carriers. These disconnected quickly to let you get the wheel in and out, and held the cable in a way that let you adjust the relationship between the straddle wire, brake arms and main brake cable independently. Riders who understood them liked them.
They also took a little time to set up right. Bike manufacturers, who have to pay people to assemble bicycles by the hour, did not like them.
There was also a darker side to this. The straddle carriers let the straddle wire disengage from the carrier and fall into the tire if something really weird happened while you were riding, like if you let the main cable degrade too much and it broke, or if you were really sloppy and didn't hook the wire up right when you put the wheel on. The straddle wire got caught in the knobs and the rider got to do a Superman impression sometimes. Some lawyer's (those who worked for manufacturers) didn't like this and wanted an idiot proof system. Other's (guess who) liked it just fine and probably made their Mercedes payments with their fat cuts of the legal settlements. An individual's position depends on which side of the courtroom they sat in I guess.

The new parts.
Shimano to the rescue. Shimano came out with straddle wires and carriers that fixed the distance between the carrier and brake arm. Easy to install, no adjustment necessary, none possible, and not much hope of getting any braking power if the thing wasn't set up with the right parts from the beginning. Sure, you could buy a bunch of different straddle wire lengths, so you could get the brake dialed, in principal. But, somehow, this never seemed to happen with standard bikes. Rider's who knew the old systems just changed a few parts and the brakes worked for them again. Riders who didn't were pissed off about their brakes.
The old systems were not doomed. There were a few ways around the rider's problems using old standard parts. First, you could just pay a little attention to the condition of the parts, hook them up right, and risk the occasional weirdness on the trail. The risk is very, very small. Cables don't just jump out of the carriers with everything set up reasonably well. Good for riders with mechanical skills - not good for the manufacturers lawyers.
Or you could hang a piece of safety wire off the stem or fork brace and loop it under the straddle wire. If anything broke, the wire caught the straddle cable before it hit the tire. You only really had to worry about the cable falling into the front wheel - a skidding rear wheel isn't fatal very often. 1 This wasn't very pretty, but it worked like a charm (Mark Michel at the Bike Trip in Santa Cruz showed me this one first).
The next easiest solution was to get a new straddle carrier design so the straddle wire is captured in use but still adjustable. You could bend a tab gently with some pliers on a stocker, or go for a $20 CNC anodized after market carrier that would do about the same thing. I don't know much about these, and I would never give gold for this sort of thing when pliers and safety wire would do the job. I'm weird that way.
I'm always working on brakes. I calculate the mechanical advantage of the system, just to see what's going on. I am always playing with designs. The mechanical advantage of one of these brakes is not the same as measuring the distance from pivot to pad and pivot to cable attachment (the ratio most punters refer to when they talk about braking leverage - a very misleading thing to do). The best way to do the calculation is to figure out how far he pad moves toward the rim for a given increment of main cable travel. This is the mechanical leverage for the system, excluding the lever. This ratio changes as the parts in the system move, so it's not a hand calculator job, though that would do in a pinch. It's best to do it on a spreadsheet. There are a couple around here somewhere so you can get an idea of what they look like.
From this analytical stuff you can see the effects of changes in the geometry of the system - pivot locations, cable lengths and angles, all the stuff you would need to know if you wanted to design good brakes or set up the ones you have the way you want. The spreadsheets show you details like how far the pad moves vertically (not a problem if you set the brakes up right) and horizontally, where the straddle wire and arms should be, etc. Fun stuff. Not as much fun as spending a lot of money on new parts, or a few other things I can think of, but still pretty fun.
Click here to see how it's done
(1) If you are going to look for somebody else to blame and then sue them when things go wrong for you, use the safety wire on both wheels.

V Brakes - the best brake in the universe!
According to the magazine headlines anyway.
So they are the latest craze. Despite what the glossies say, the same rags that make their living off of trends like this, both in ad revenue and reader interest, you really don't need them (in a basic, practical sense, like you need food and warmth). But the hypemeisters went off on them, in their own special high powered way, clearing the way to warp speed commerce, without much knowledge or riding time to back it up of course, so the frenzy is being force fed and you are the (often willing) target. You need these brakes! Ante up, be trendy, ride the latest.
What if you did get some? What happens next? One, you have to work overtime for a month to pay off the bill. Two, you wear out tires from skidding a lot until you get a light touch. Two and a half, maybe you check out the soil with a face plant or two - the brakes stop hard. More?
Turns out that there are a few more ahhh� complications. The number and location of unsealed pivots on the brakes, while not a fatal defect, definitely create a new, annoying maintenance chore you probably won't look after until it's way too late. Unsealed bearings in a harsh environment are not a clever idea. Ask Herr Leitner. Need some spare parts to keep the things going a few years from now? Right. Maybe it's better to upgrade to next year's model. Bike parts could be sold like software, where the big hook is regular upgrades.
This is not Shimano's fault. The brakes work well enough. They do the job they were intended to do; they just have a short fuse. No one said otherwise. The designs will change and change again, on a two year cycle, until the brakes are dialed and everybody who could possibly want some get some. If you don't like throwaway brakes, bitch loud and stop paying for the stuff. Otherwise, caveat emptor, eh?
You might think this is a drag. On the other hand, you might think this is good for you and the sport, I guess, since, among other things, it gives you another opportunity to have some respect for the differences between new designs and mature ones. And the worn out brakes can go in the recycling bin along with the derailleurs, shifters, and frame when they all wear out, maybe even at the same time. At the $0.25/lb you get over the hill, that's about $1.25 in scrap value. Vast excess in modern consumption habits drive the industrial world's economies right? We don't want to mess with that.
None of this will be a choice for you if you are in the market for a new bike. You are going to get these things on bikes next year, ours along with everybody else's. Retailers were clear on this point. They would not order bikes without the new brakes on them. They would not be able to sell them. We'd starve if we swam upstream on this one, and, while we don't mind a good hard against-the-grain dog paddle now and then, we're not always that stupid (you may disagree about this, but it works for my point in this case).
Poor (?) Shimano didn't realize they were creating such a monster demand for the brake. They can't keep up. To their credit they probably weren't planning to make that many in the first place since the brake is fundamentally designed to solve the cable routing hassles you have when you try to set up a standard cantilever brake on the back of a bike with a swing arm. The poor marketing department missed it when they listened to the engineers the first time around; marketing folks should never listen to engineers. But they pounced when they heard the clawing at the door. Who could have guessed that the brakes would be the meeee tooooo meeee toooooo aftermarket part of the year.
Back to the positive side. I like V brakes for their intended application. They solve cable routing problems on full suspension bikes. V brakes let a frame designer install a rear brake on a bike without cable stops on the rear triangle (or whatever shape it's become these days). That's it, the basic idea.
To do this, Shimano had to extend the arms above the tire. There aren't many other ways to do it (there are a few but they add even more moving widgets in all the wrong places). Then they had to turn down the leverage or they would maim too many bike part buying riders. The future of the sport, and their revenue, would go in the tank. I know, I know, there are those who can ride the brakes connected to standard levers. I've tried it. I think they are really just being brave buckaroos, going for a merit badge and not really dialing in their brakes. That's fine, let them.
What else is good about V brakes? Not that much. They're dressed up with a new pad so the after market brake pad folks have to chase a moving target. The new pads add some rigidity to the system, (the combination of a thin pad and firm compound isn't as compressible) but it's a small effect. The pads don't seem to wear much longer than old style pads in our experience. Maybe not as long, but I have no measurements yet.
The 4 bar lever system Shimano devised to make the pad move in a flat trajectory towards the rim is icing on the cake. And, as is often the case with frilly toppings, the brake would probably be better if it were left off. I can't see the value in this one, and the downside is clear. (If you are dying for a V-brake check out the LX units for a simpler, possibly more durable design). Oh yeah, the pads don't quite move out of the way when the brake is released in a lot of cases, so the tire has do get hand hammered through the gap when the brakes are retracted, in order to get the wheel out. This is admittedly a tough part of design, compatibility with surrounding components. Details, details.
Technical innovation? Maybe. Smart marketing? In hindsight, probably. Good brakes? Depends on your goals and your means, certainly not overwhelmingly better. Do I have a bad attitude about this sort of thing? Clearly.
I've thought about this before. Believe it or not, I designed brakes like this 8 years ago. The FS bike Paul Turner and I hacked together for Kestrel back then (The Nitro) had brakes like this on it. Others have figured it out along the way too. I didn't design in the 4 bar linkage food because I thought it was unnecessary, maybe stupid. There was also a huge problem with matching the brakes with a new brake lever standard, and I was in no position to take on the chore of convincing the knobby universe that they needed a new lever standard that took up more cable when you pulled them. My design was put to rest because of the lever problem and because there weren't many FS bikes around back then that needed them, and that is what the design was for in the first place.

Bontrager SPEED-B-GONZ - circa 1986? - all parts made by Laura
Besides, I knew that the rest of the world could get good leverage out of standard cantilevers if they wanted it (and it's not clear to me that this is a huge improvement in a bike's performance). You just have to dial them in right. No one would be silly and buy an expensive brake if there was no clear advantage to it.

700c Speed-B-GONZ version (borrowing heavily from Mafac design).
What was that???
First of all, I was wrong again. Predicting a charge for the cliffs by the masses is a psychological puzzle, not an engineering exercise. Not my forte.
Second, standard cantilever brakes really can be dialed in to perform as well. The magazines forgot to mention this, but then, disclosure of technical information really isn't their mission is it.
So the appropriate question now is, what if you didn't get some? Could you have trick brakes somehow anyway? Step right up. For less than $10 invested in some old style parts you can match the stopping power of the V brake with most cantilevers, even the cheapo STX units. You won't have to throw away your current, expensive shifter/brake lever combos just to feel what it's like to ride with brakes that have a high mechanical advantage. You may find you don't like it that much anyway. You won't have to survive by eating kidnapped pets for dinner just because you spent all your money on brakes that can send you over the bars with one finger. You can even get an edge by letting those lemmings that have been sucked in know just how much money they wasted.
Retro? Maybe. Depends on what you mean by that. Bad attitude? (As in, How can we keep this industry snowballing if you're going to be so damned practical?) Yep. Not my problem. Useful information? Yes. I ride with tricked out cantilevers. (Except the Pissing Dog prototypes, duly equipped with V Brakes and other prototypes). We don't sell anything I recommend in this document.
The LARGE PRINT giveth and the small print taketh away ( a line stolen from Tom Waits who probably stole it from someone else)
It's not all blue sky. The downside of the modifications (neatly arranged in more cool bullet points)�
• It costs $10 or so for the parts.
• You have to know what you are doing to do it right.
• The parts may be hard to find so you'll have to find a shop where they keep obsolete inventory around in order to score some of them.
• The straddle wire ends up about the same distance from the tire as the bottom side of the fork brace, closer than it is with the stock parts. It might catch a mud or twigs occasionally, but not very often in my experience, and not enough to slow you down.
• The leverage in the modified cantilever brakes is more sensitive to small changes in the set up due to wear. As the pads wear the system loses a little leverage. You'll have to maintain the brakes, especially the overall cable and pad adjustment, to keep the leverage high.
The last bit isn't unique to cantilevers. Brakes require adjustment. It's no big deal - a fact of life. V brakes chew through pads with the best of them. They just don't go through much of a change in leverage as they wear. You have to adjust the pads in the cantilever brake back to the original settings every now and then, instead of just cranking out the adjuster barrel on the lever all the time to keep them strong.
There may be a way out of this someday. If the guys hawking disc brakes ever figure out how to con the magazines into a good, relentless, fully hyped up rave about them, there may be less maintenance intensive brakes in the future. Maybe it would get launched if Shimano came up with one, so there's some serious horsepower and big ad money behind it? In the meantime there are a lot of other technical hassles to work out with discs; it's definitely not their time yet for most riders. We're stuck with having to know what to do and how to do it with inexpensive, easy to maintain, good performing, boring, practical parts. Bad news, eh? Sorry.
There is a way you can get around all of this if you are stuck with old style, out of date, out of fashion, not really up to the task anymore seemingly, cantilever brakes. Really. You have to replace a few nickel and dime parts that the lawyers made obsolete years ago, set them up right, and away you go, errr� stop.


Sunday, July 02, 2006

Custom Cross #6: Jeromy's Bontrager


Jeromy's got a vintage handbuilt Bontrager CX ride to be added to the handbuilt gallery. This bike looks cool, mainly because it looks like it gets ridden.


The specs are:
Frame: Bontrager
Fork: Steelman
Cranks: Shimano
Stem: Salsa
Bars: Salsa Bell Laps
Saddle: WTB
Pedals: Shimano

Jeromy said:
"I'll be stoked to see my bike there once posted. I'll be adding in the near future a threadless king headset along with a fork and stem, probably pauls brakes, we'll see. Right now, the bike is great and really doesn't need upgrading, just on the decents with the old style headset the fork chatter could be eliminated with a king threadless headset for sure. But it's pretty cool vintage 1" quill, don't you think?"

I've always had a thing for those Salsa stems. Cool looking ride.

If you have a handbuilt cyclocross bike email it to me at plusonelap@gmail.com

Friday, June 30, 2006

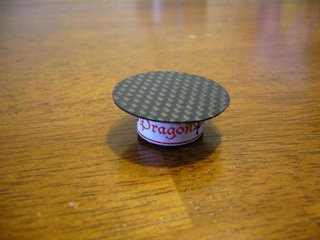
DIY Carbon top cap


So, in the last installment of the +1lap DIY channel, I showed you how to make carbon bar end caps. This time were making a carbon top cap assembly.

So, let’s start from the beginning. Topcaps are for suckers. The topcap is tightened to compress the headset bearings appropriately, then the stem is tightened down, then the top cap becomes a gravity virus on your bike. They don’t really do anything after the stem is tightened (other than keep rain and mud out of your steering tube) I mean, its not holding the compression still, because your stem isn’t loose it it? I rode all last season in cyclocross without a topcap at all.

I got teased a little, “what trying to save some weight?”

Me: “Umm yes.”

Well, some people have crammed a beer bottle cap into the steering tube to add a little flair. That works well. But I’ve noticed sometimes the cap doesn’t fit in there too great. Schmolke makes a carbon topcap and they can be bought for $60. They say that there’s supports the carbon steer tube from being crushed. Well, my Alpha Q fork already has a compression thingy in there protecting the steering tube, so I decided to make a decorative top cap that would look cool and keep the rain and mud out.

I used the same carbon plate as I did for the bar caps. But you’ll need another type of carbon from Dragonplate for this project too. You’ll need the carbon veneer stuff (its bendy). This is what fits inside of the steering tube and then the carbon plate is JB welded onto the top of the ring.

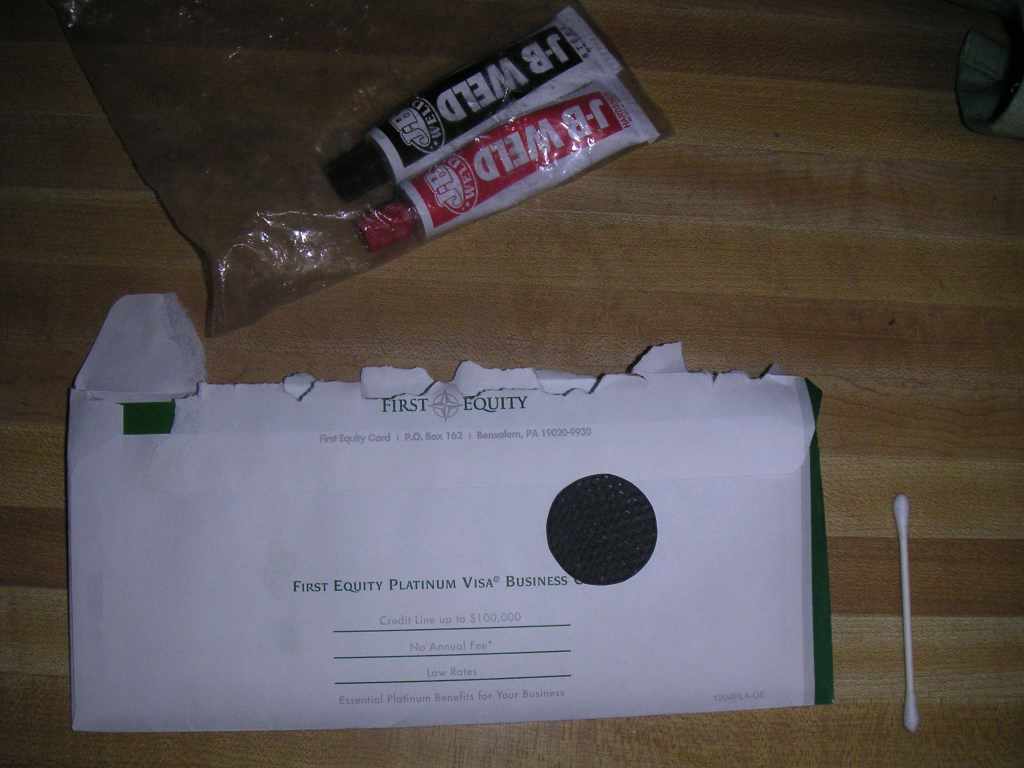
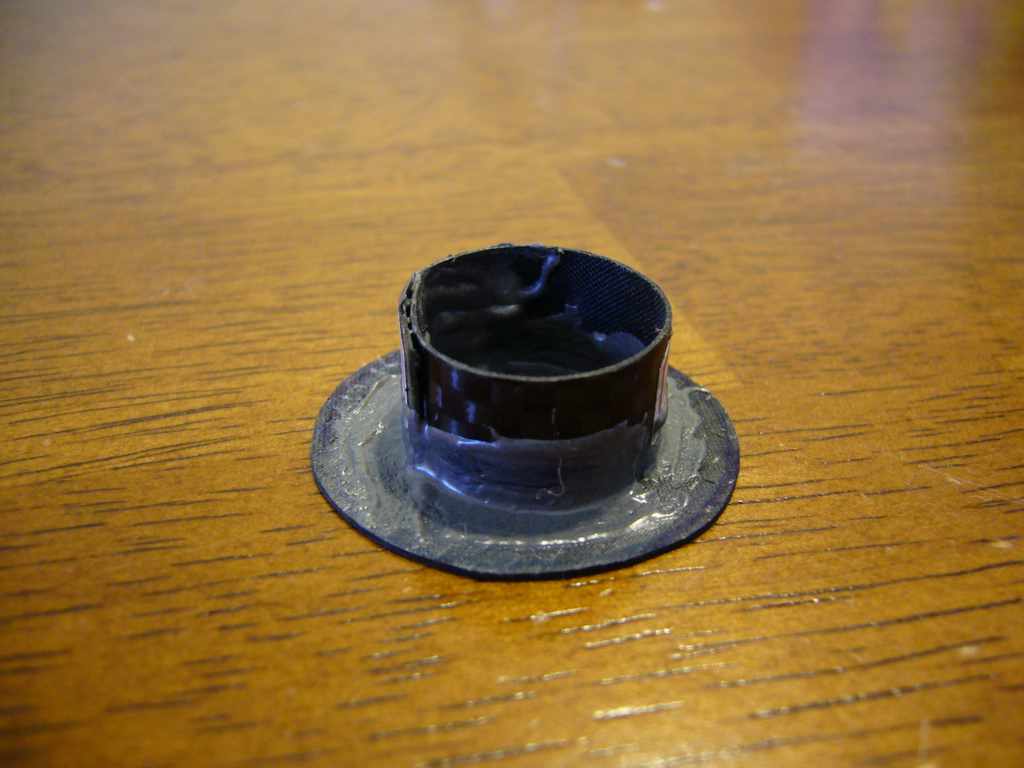
The veneer stuff can be cut with kitchen scissors (just don’t let your significant other see you do this) to a size that fits within the steering tube and allows for about a ½ inch overlap. Apply some JB weld between the two parts that will be overlapped. This will sandwich the JB weld between the two layers. Then, apply some JB to the inside of the ring so that there’s JB all over the place securing the piece of veneer to itself. Let this sit overnight.

Next, cut a piece of carbon for the top cap (mines about 1 ¼ in diameter). Then place the topcap piece upside down on your work area, set the ring on top of it, and apply JB to the interior of the unit, coating it well. Let that dry.


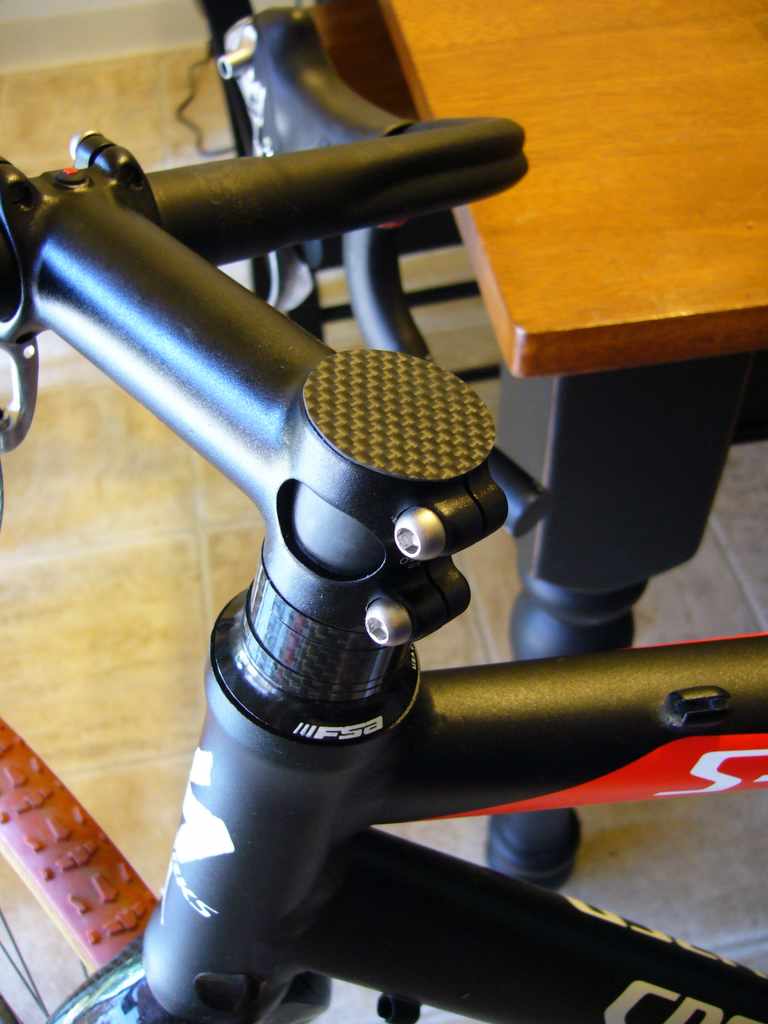
Then push it into place. Simple.


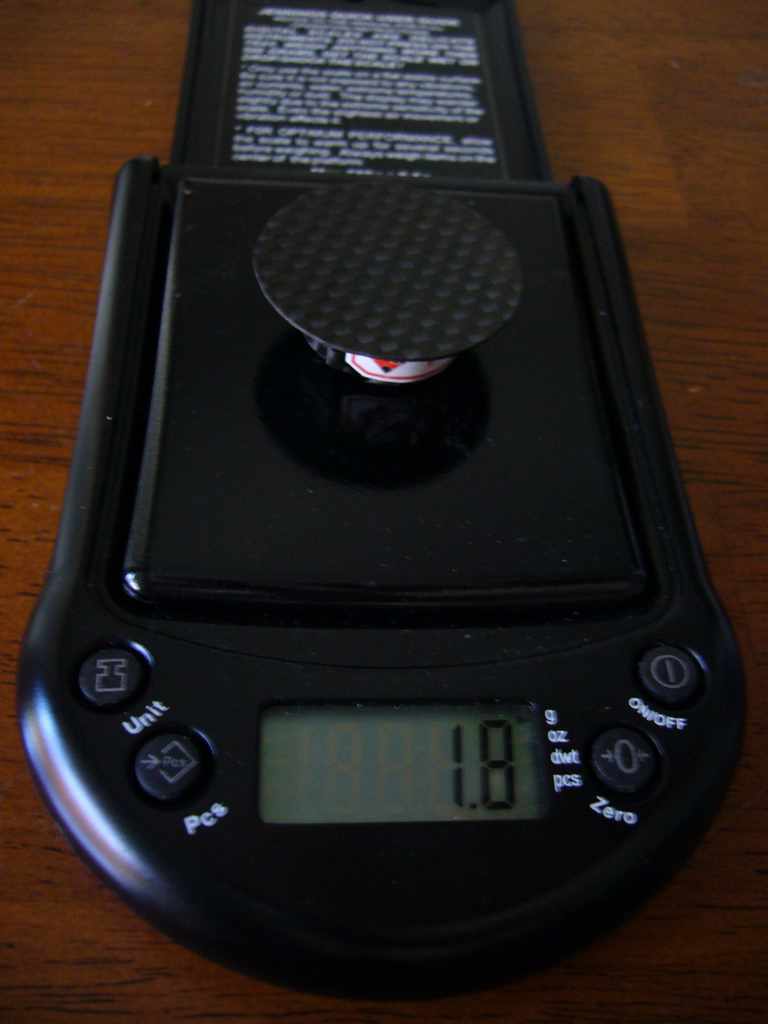
Stock topcap assemblies with steel bolts can weigh 16.2 grams (I just weighed one I had in my tool box) you can drop this weight by using an aluminum bolt or you can make one as I did.

My carbon topcap weighs only 1.8 grams. And again, it looks really cool.

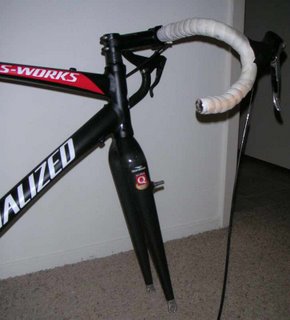
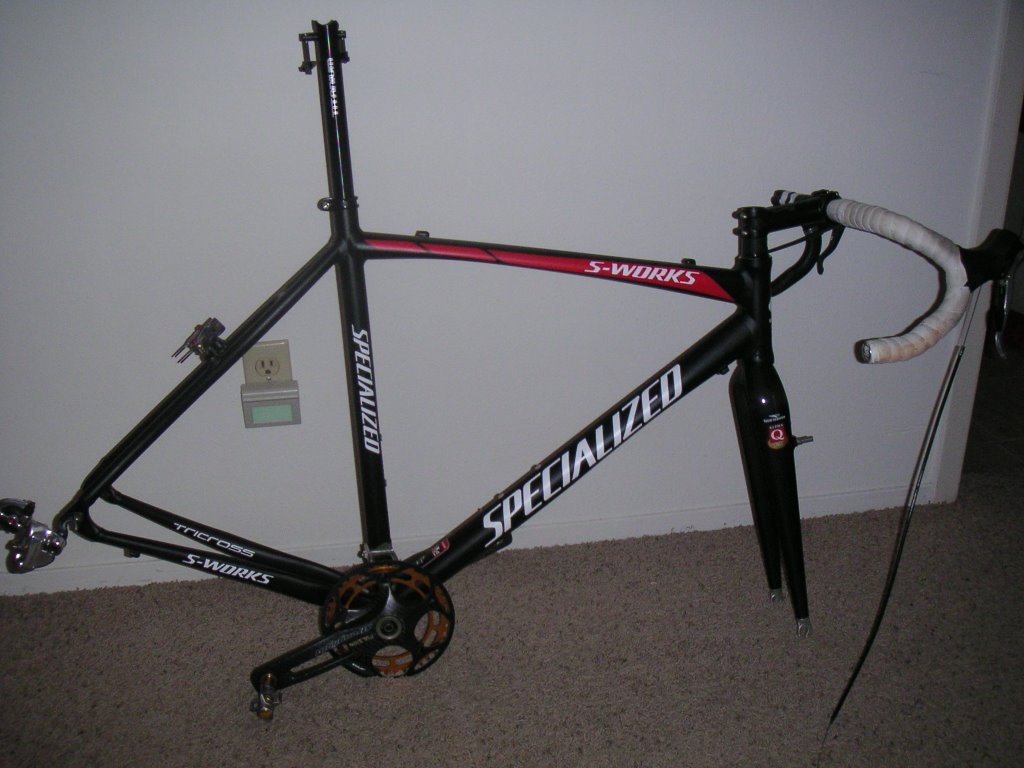
And yes, for those playing the home game, that is my Specialized Tricross that is almost built up.

Thursday, June 29, 2006

The current National 2006 CX calendar

So, I've been collecting race dates for the 2006 season and organizing them into one location. That location is here.

If you are a race director and want your event to be added to this calendar, email me the info for your series to plusonelap@gmail.com

Wednesday, June 28, 2006

DIY: Making Bar End Caps


This is a little tutorial on how to make your own carbon bar end “plugs”. I put plugs in quotations because these are epoxied into place (how often do you remove your bar end plugs anyway?).

This is a really easy project to do and fun for the whole family! Well not really. Unless your whole family likes messing around with JB Weld and carbon fiber dust in the pursuit to lose about 5 grams and to pimp your ride.

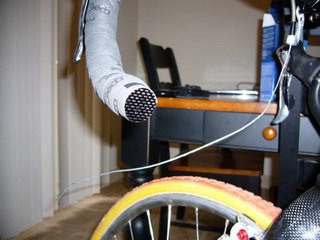
The concept is that you don’t need to have your bar tape go into your bars, just tape it off down there and have these lightweight sexy carbon weave bar caps doing the trick. For the ultra weight weenie who doesn’t think he needs bar plugs or blockers, you do. I took a hunk of organic material out of my thigh once because I went for a short test ride on my CX bike just to see how the derailleur was shifting, I saw a little trail, crashed and my thigh jammed into my open bars. Ouch.

Anyway, I got my carbon fiber plate from Dragonplate.com. You don’t need too thick of stuff, because there’s really no stress placed on this item. I had a circle template, found the right size circle (1” is pretty close or 15/16) Then I just shaped it down into a pretty good circle on a bench grinder (Dremel would work but not as well) and JB welded it onto my bars of choice.


Plastic cheapo bar plugs are light at about 5-6 grams a pair. Mine weigh .8 grams (maybe 1 gram when you add in the JB weld). And they look better.

Next time, on the +1lap DIY channel, I’ll show you how I made my carbon topcap, and saved myself about $50 bones.

Tuesday, June 27, 2006

Racing: Nashville Cyclocross

Not to be outdone, the Nashville crew has come out with their race series info as well. Go here to check it out.

They even have cash awards!

If you have a cyclocross series you'd like to have promoted, email me at plusonelap@gmail.com

Racing: Idaho cyclocross


Calling all Idaho-ians...heres your race calendar. The Race director for the Idaho cyclocross series has emailed me a link to their website of all the cross going down in that state this upcoming season. Go here for the info.

All other race directors, email me your race dates to plusonelap@gmail.com so that your race can be featured on +1lap as well.

Friday, June 23, 2006

Buy my cranks--sold


Thanks, they sold at my buy it now price.

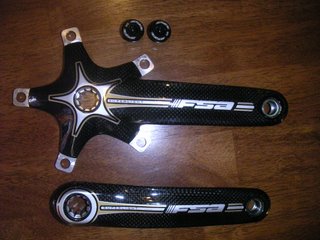
Yeah, so im selling my FSA Superlight cranks over on the ebay. If you need a set of cranks that only weigh 373 grams. For reference, Shimano Dura Ace 7700 in 172.5 weigh 470 grams. You'll lose almost a 1/4 pound off your bike! Link

They are 172.5mm long and ISIS bb compatible and 130 bcd bolt circle. These sold for $166 in auction, then the douche decided he didnt want them anymore, then I relisted and they didnt sell, now im relisting again. Maybe one of my dearest readers of +1lap will decide to upgrade with my cranks?

Wednesday, June 21, 2006

Browsing Flickr...Vanilla cyclocross.


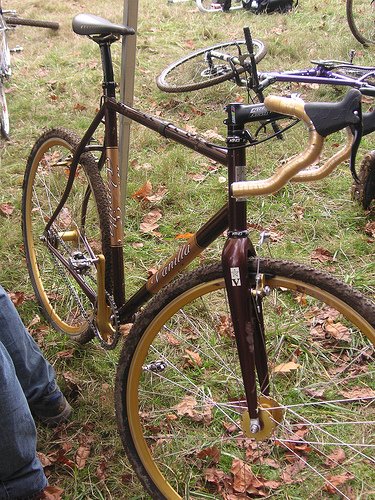
So I was browsing Flickr awhile back and came across this Vanilla cyclocross bike. Its pretty sweet. If anyone wants to claim it as their own, let me know, I'd like to put it into the custom cross gallery. Im a sucker for the gold accents. Link

Saturday, June 10, 2006

Finally, got my fork!


Yeah so I've had this badass frame sitting in a boring old box for the last who knows how many months, waiting for a fork. Last week, I decided to go ahead with the build with my Woundup fork. Then, I got a pretty killer deal on an Alpha Q cx fork, bought it, got it today, and now finally the build is on!


Im excited, this should be a cool bike once its done, and I think I have all the parts necessary now. The Alpha Q wasnt much lighter than the Woundup, but it looks pretty cool, and it was a little lighter. The fork came in at 550 grams (including the starnut) in a steerer tube length of 208mm.

Im selling my Woundup on the ebay...here.

Monday, June 05, 2006

My interview with Jonathan Page


An interview with United States’ best ever cyclocross racer, Jonathan Page? Here? Yep, JP sat down with Plus One Lap to answer some burning questions as he prepares to enter the 2006 cross season. Hear what he had to say…

Plus one lap: What's it like being one of the only Americans in a Euro-dominated sport?

Jonathan Page: It's getting much better now that I have earned some respect over there. I don't feel any sense of alienation or anything over there. I feel like they treat me as just another competitor now but it wasn't easy!

+1lap: How's your Dutch?

JP: I can swear and I know a lot of bad words. I hated school growing up so I just can't get myself to go to classes like my wife does. Soon my 1.5 year old daughter will know more Dutch than me and then I guess I'll have to get into school...

+1lap: You got food poisoning before Nationals last year and still placed third, what was the decision process like to determine whether you were going to race or stay in bed? What was it like racing Nationals in that condition?

JP: For me, there was no decision. I knew I was going to go out there and try, no matter how bad I felt and even if I didn't make it more than a few feet past the start line. Otherwise I would have felt like I just gave it away. There were a lot of people that were counting on me; sponsors, family, friends, supporters...I didn't want to let them down. But honestly, it was horrible racing in that condition. I was vomiting every lap and I had to throw my skinsuit away...if you know what I mean. After a few laps, I no longer cared what place I got, I just wanted to make it through. I felt like I at least owed that to everyone. But, afterward, I paid for it too. My wife recovered 2 days later but I was still suffering after a week. It's not fun to race when you can't really race. I hope it was a once in a lifetime experience.

+1lap: Is your only US race this coming season going to be Nationals, as you have done in the past?

JP: Probably. Unless nationals is held in December instead of in Jan. like the rest of the world. Then I won't come at all.

+1lap: You got 10th in the World Champs this year, was that one of your greatest sporting accomplishments? What was that race like for you? Were the stairs as brutal as they looked on Sporza (Dutch TV)?

JP: I am definitely proud of that result and I know that there is still room for improvement so that makes me very hopeful and motivated for the next seasons to come. The race was fast and hard. I made 1 mistake with less than 3 laps to go and couldn't make up for it. That was disappointing because I had made it through the selections and just as I settled in for the final, I fell. Yeah, the stairs were hard but then you had to get on your bike and climb a hill at full speed. That was harder.

+1lap: Any tips to amateur racers as far as choosing the "right" tire pressure for a particular course? What sorts of principles guide your air pressure choices?

JP: Tire pressure is an individual choice I think.

+1lap: What would you say is your weakness in a CX race? Your strength?

JP: My wife is typing these answers as I talk while coralling my daughter who is jumping on the hotel bed...I was thinking of my answer for weakness and she said "thats easy...selling yourself"! Thats true. I have worked hard to make my weaknesses in the races not weaknesses anymore but I missed a lot of opportunities in the sport before I got some help from a friend that has become an agent. So, my biggest weakness is the business part of the sport. My strength? My biggest strength is my bike handling skills.

+1lap: In your opinion, why is cross suddenly becoming more popular in America?

JP: It's fun to watch! More fun than road racing. It's also fun to participate.

+1lap: If you were never a pro-cyclist what would you want to do instead?

JP: I would want to landscape in the summertime and teach skiing in the winter.

+1lap: You're going to be celebrating your 30th birthday this September, has that made you think about how many more years you have as a pro bike racer? Any thoughts about what you'll do after you stop racing professionally?

JP: Knowing that I will be 30 has made me realize that now is the time to get some great results so people will notice and so I can race for more years to come. I'm going to continue spending quality time with my family and hopefully not get stuck working behind a desk. I'll try to find something I enjoy.

Jonathan Page got 10th place at last year’s Cyclocross World Championships (the best ever placing for an American). He can be found on the web at www.thejonathanpage.com.

Photo courtesy of www.thejonathanpage.com

My sub $40, 4 bike indoor rack


I made a bike rack a few months ago, and thought you folks might think this is interesting. Yeah, they make professional wall-mounted bike racks, they even sell them at Target. But this rack is better. Why? Because, it holds 4 bikes easily, in the space normally needed for 2 bikes, and it cost me less than $40 and only requires 2 small holes to be drilled into the wall to hold it up.


The parameters of the rack were that it 1) needed to hold 4 bikes. None of the wall mounted racks available can hold 4 bikes, usually only 2. 2) the bikes couldn’t stick out from the wall very far as the room is small. 3) no major holes going into the walls as this is an apartment and I want my deposit back. 4) I didnt want it to cost much.

This was a fairly simple project, after the idea was down on paper. And I think anyone with moderate skills could build this.

Materials required:
four 2x4’s,
two ¾” threaded rods that are 24” long and bolt hardware,
one ½” threaded rod and hardware,
screws,
2 steel plates
and some pipe insulation.

Tools needed:
Saw,
drill,
¾” auger drill bit,
½” auger drill bit,
drill,
stud finder,
pliers/crescent wrench.

The basic premise is that two bikes are hung on each ¾” rod which comes out from the top of the structure. Also, the 1/2” rod is mounted on the rear beam of the rack to stop the tires from the left series of bikes to sway into the right series of bikes. I've attached a picture of the dimensions.

Here are some measurements (note: I am 6’3” and therefore my bikes are on the larger end, therefore these measurements should work for all bikes)

There are 2 height beams that are 72” tall each

There are 2 cross beams that are 66” wide each

The right threaded rod is 9” in from the right side of the structure

The left threaded rod is 12” in from the left side of the structure

The entire structure is 5 ¼ out from right wall.

Top of lower crossmember is 15.5” from the floor.

The entire unit can be placed on a wall that is at least 87” wide.

The crossmembers must be screwed onto the outside face of the beams (to allow room for the bolts on the backside of the threaded rods)


Threaded rods use 2 lock washers, 2 flat washers and one two bolts each.

The top crossmember carries all of the weight of the bikes, therefore, to minimize the amount of twist in the top crossmember, I bolted on a steel plate to the end joint of where the beam and the cross member meet.


Lastly, find the studs in your wall, and screw the unit directly into the stud----not just the sheetrock. I was only able to put 2 wood screws into the wall, but that has been fine thus far. A lot of the weight from the bikes is transferred to the floor. The wall screws are only there so that the unit stays attached to the wall (they don’t hold much weight).

Here's a picture of the lower rod holding the wheel of the left bike from hitting the right bike.


Under the structure, I’ve found that it’s a great place to store my cycling and running shoes, helmets, accessories, etc. Also, I have thought of adding a shelf above the bikes, mounted to this rack to aid in extra storage.

I have been using this for the past 3 months without any issues. In order to get 2 bikes per rod you need to put one bike’s front wheel in the rod and the other bike’s rear wheel. The picture only shows 2 bikes and 2 framesets in the rack, but it holds 4 bikes fine.


Plus One Lap Weight Wiki

I decided to start a WIKI bike weight list called Plusonelap.com Weight Wiki found here: http://plusonelap.pbwiki.com/

A wiki is defined as "A website or similar online resource which allows users to add and edit content collectively." Source One of the most popular wikis out there is Wikipedia

The benefits of a Wiki are that anyone can post their bike component weights to the wiki and it is added immediately, no longer do you have to wait for a moderator to upload your weight to the listings. Its a site ran by you, the weight obsessed.

The only downside is that the listings cant be sorted by lightest,heaviest, etc...instead I've tried to make them alphabetical.

The process to become a contributor to this wiki is on the plusonelap wiki website----but basically, you register with pbwiki.com
Then, you send me an email at plusonelap@gmail.com to request the wiki's password so that you may begin adding component weights.

Hope you guys like it. Now go post some weights.

Dual Gallery bike #5, #15: Dan's Steelman


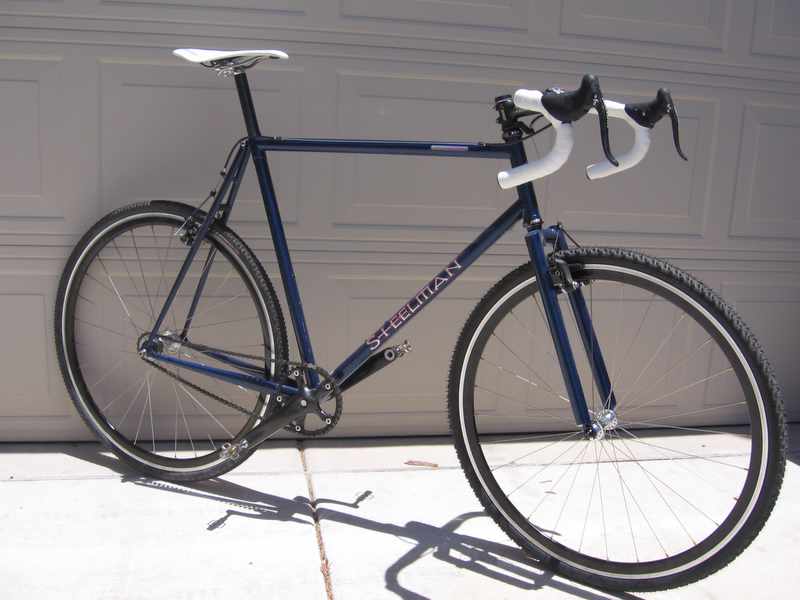
The first singlespeed cyclocross bike in either gallery is this Steelman which weighs in at a light 17.05 lbs putting it into both galleries, the second dual gallery bike. Its #5 in the Custom Gallery and #15 in the Lightweight one.


Build List
Frame- Steelman Eurocross custom 58x59
Fork- Sibex ti
Wheels- White Ind. H1/Eno laced to Niobium 30mm rims on DT revos
Tires- Front Michelin Mud, Rear Bontrager Jones, Tubed, but will be replacing with No Tubes
Stem- Ritchey WCS, Ti bolts, Custom carbon top cap
Bars- Deda 31.8 Newton shallow
Levers- Record
Brakes- Avid shorties, tuned
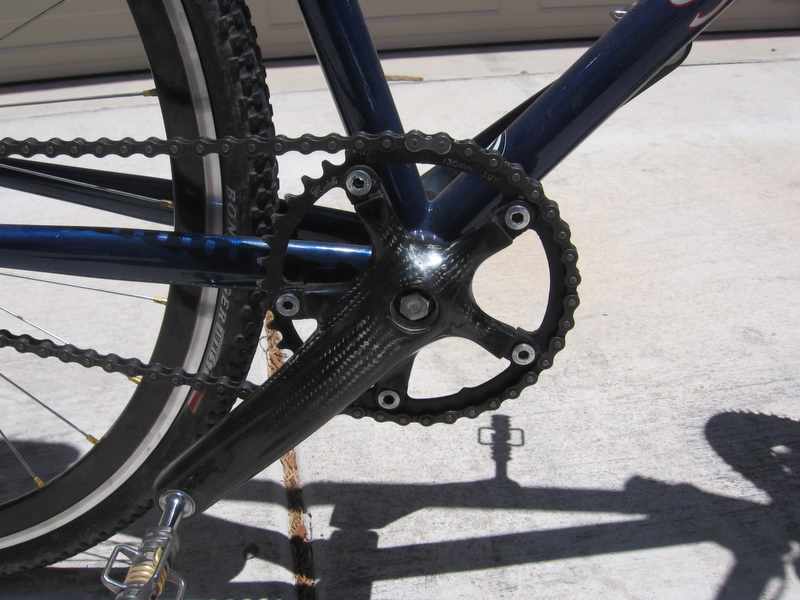
Cranks/bb- Storck Power Arms, TA 39 tooth ring., crap steel sealed bearing BB.
Pedals- Egg Beater Ti, will have shortened spindles added shortly.
Seat- SLR
Seatpost- Record.

Total weight 17.05 lbs.

The bike could be a lot lighter and when it is finally done will have probably shed 1/4 lb or so. It rides very well and will be my back-up pit bike. Thanks Jeremy for the blog, everyone please check out the website www.arcvelo.com.

If you have a handbuilt or sub 18lb cross bike send it to me at plusonelap@gmail.com

Sunday, June 04, 2006

Wash your gloves


So, this weekend, I went through a lot of my boxes in the back bedroom and threw away a lot of crap. In one of the boxes, was an old pair of cycling gloves. I remembered them from a few years ago, and they stunk. Sweat, grease, dirt, snot and god knows what else combined make a bad smell. I dont know if youre supposed to wash gloves, I never have, I've never heard of anyone doing it, but I did.

It was pretty simple, I put some hot water into my sink, squirted some Dr Bronners soap in as well and scrubbed the two gloves together. When the water turns to chocolate milk, its time to drain and repeat. The second time it looked a little less brown. Then I put them out in the sun to dry. And now they seem as good as new.

This isnt rocket science and I wont win a Pulitzer or a Webby for this article, but I've never read of someone washing their cycling gloves. Maybe its just so common that no one thought they had to write a moronic article----but this is the internet.

Anyway, if your gloves stink wash them. They wont disintegrate, melt, shrink or anything else. Ride on.