Plus One Lap used to be all about cyclocross, now it's my dumping grounds for anything cycling.
Monday, February 27, 2006
Homemade Ti cantilever return springs
So, the second part of my Carbon Cantilever project is to make the titanium cantilever return springs. I know that this wont drop much weight as the standard steel springs weigh in at about 9 grams a pair. But, I want these brakes to be as light as possible without giving up functionality. Also, because my carbon arms are a different dimension than anything else out there, I was going to have make some custom springs anyway, why not make them out of titanium?
I didnt invent titanium springs or how to make them. I found a post on weight weenies that showed how to make a ti spring out of a titanium spoke for use on a front derailleur (see link below). After seeing this, I thought I could do the same thing for my carbon brakes. I ordered some titanium springs in 2.0 width and received them yesterday. This morning I went to work.
Items you'll need for this project are: a benchmounted vise, 1 needle nose Vice Grips, 1 standard Vice Grips, a titanium spoke, a wire coat hanger, some wire cutters and a 3/8" bolt to wrap around.
I used a 3/8" bolt and it seems to have worked well. I made my first set a little too short (as I matched the empella froggleggs spring identically--or pretty close and my brakes dont have the same dimensions as the Empella's). So I made another pair.
The coat hanger is used to hold one end of the titanoium spoke. Also, I'd recommend practicing making these with a length of coat hanger as coat hangers are generally free and titanium spokes generally are not--and youre probably going to screw the first one up a little, I did.
You'll need to make two coathanger eyelets that hold the titanium spoke. One that wraps one direction and another than wraps the other direction. Due to the left and rind sidedness of the springs.
I decided to wrap the titanium around the bolt differently for each side to determine which spring tension was best. One was wrapped 3x around the bolt (like the empella's) and the other is 2x around. I'll test to see which one I like better.
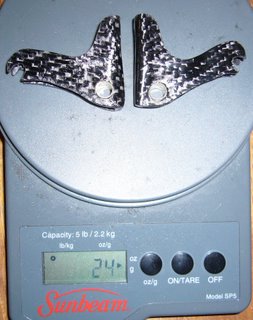
Total weight came in at 5 grams for the pair compared to the 9 grams for the standard springs. While, this only saved 4 grams, part of the reason is that my springs are larger to accomodate the shape of my carbon arms.
The Weight Weenie thread that shows how to make a ti spring for a front der.
Friday, February 24, 2006
Carbon Cantilever Brake Arms are finished
So, the first set of carbon cantilever brake arms have been completed. The arms themselves dont look like they rolled out the latest high tech factory----and thats probably because they havent. They look pretty good though I think. I finished the second arm yesterday, then sprayed them both with a clear coat (which added 3 grams). Still left is to epoxy the brass sleeves in place, and make the titanium springs. Also, I'm tuning the brake pads as well with some aluminum bolts, which I have yet to order.
Brass might seem a heavy item to put on these brakes, but each sleeve weighed about 1 gram, and they fit perfectly, and they were a lot easier than trying to fabricate a carbon sleeve to put in there. Also, brass is pretty weatherproof, so thats good.
I have some ideas on version 2, on how to make these look a little better, primarily I'd like to try a female mold instead of a male mold.
If I hadnt posted that I was even attempting this project, I'm not sure I would have ever got this far, so thanks to all you of whom come to this site.
Wednesday, February 22, 2006
Single Ring on a Cyclocross bike
I like the single ring setup. Yes, it doesnt give you the ultimate range in gears, but it makes up for that in many other ways. Bikeman.com does a good write up on the ins and outs of a single ring cyclocross bike: "Partially for simplicity, partially for a little extra clearance, and mostly because it just makes sense. We will get into the math a bit later but first lets see what modifications you will need to convert your stead to a single front chainring."
The single ring conversion is pretty straight forward. First of all we need to remove the front shifter, front derailleur and all the cables associated with them. This is a very basic process that will require the use of a few allen wrenches, depending on your current shifter and front derailleur selections.
The next step is to remove your outer and inner chainrings. This will require you to take the drive side crank arm off the bike to access and remove the inner ring. Tools required for this process vary according to what crank arm you are using. If you have questions on what tool will aid in the removal of your crank arm you can E-mail me and I'll send you a link to the correct tool.
Continue reading this article by going here (via:Bikeman.com)
Tuesday, February 21, 2006
Everyone needs a few scales
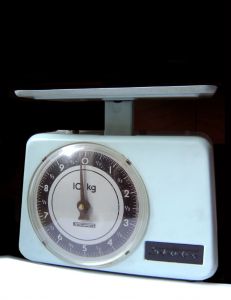
So maybe youre interested in this lightweight cyclocross bike thing, and you want to lighten your bike some (or maybe a lot) and you've no doubt ran into a common problem----you have no idea what anything weighs. Well, a good scale is essential to being a weight conscious freak. The question is: "what kind of scale should you get?"
Digital is going to be the first answer. Yes, if you have access to those old scales in Physics Labs across the world that use little weights here and a platform there, thats great. But youre not reading this article on a typewriter----its 2006 and were all digital.
Next, scales have maximum weights anywhere from 250 grams to 400 lbs. Which max weight should you buy? Well that depends on what it is youre going to weigh. If you just want to weigh individual parts go with a scale that has a max weight of say 5-10 lbs. If you want to weigh a complete bike, you'll need a scale that weighs up to the heaviest your bike will be. I would recommend a scale that at least has a max of 25 lbs.
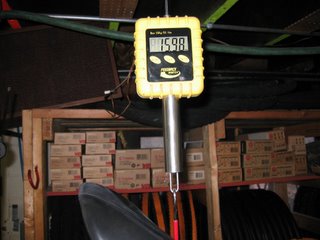
Many people have both. I have three. I own a jewelry scale that measures down to .1 grams. A "postal" type scale that weighs 1 gram to 5 lbs and an ultimate alpine scale that weighs from 10 grams to 55 lbs. This is a good scale. And it could fairly easily handle all of your bike weighing needs. Hanging a plastic grocery bag from the scale and placing a small part (such as a derailleur) in the bag would give you a pretty good idea of that parts weight as well. It wont weight very light parts, but it will do the job of a whole bike scale and a reasonably small parts scale as well. The Ultimate scale isnt cheap at $65, but it does seem accurate and sturdy and most weight weenies will concur.
Sunday, February 19, 2006
Carbon cantilever update #3
So, I again had problems with the carbon fiber cantilever brake project. I pulled the carbon out of the mold (material I put in there on Friday)
today in order to shape the other arm and it was just soft and flexy and crap. So I threw that away, and decided to try again. This time I went back to the old resin I was accustomed to, brought it into the back porch, with a heat lamp in the room and in the vacuum bag. I also brought a thermometer into the room so that I would know what temperature it was at. About 75 F is perfect, and I had the room at 78 F so thats close enough. I just pulled the carbon out of the mold, and its hard. So thats good. I'll be able to shape this whenever I get a chance to.
Yeah, so this is a lot of work. And it would be easier to buy the Spooky Carbon Canti's. However, this is relatively cheap (other than my time), and my pair should weigh in significantly lighter than the Spooky pair (around 30 grams saved per pair). Check back for updates.
I'm going to me fabricating my own titanium springs, and at this point it looks like I'll be making the small aluminum nuts for the end of the arms.
Friday, February 17, 2006
An update on my project....
Well, unless you have bad eyesight or didnt see my last post, I'm working on making carbon cantilever brakes. I got one arm nearly finished (all thats left is to spray it with a clear coat). I wanted to have them done by today and to have some pics for the website, but I ran into some problems...
...My first mold that I made was all wrong. And I didnt realize that until I took the carbon out of the mold. And started looking at it (you can see the inferior prototype in the main picture of my drawings--its sitting off to the side of the picture).
I went back to the "drawing board" and produced the designs that are pictured in the first post of this little "series". Those drawings resulted in a second mold, in which I was trying to create both arms at the same time, saving time and money. But, that didnt work out so well and I had to sacrifice a good deal of material just to get one arm out of the mess (when I pulled the carbon off of the mold, it pretty much destroyed the mold itself).
So I had to make another mold (#3), and I layed up some carbon yesterday to make the other arm. Unfortunately, its 50 F here in Sacramento and I didnt add enough catalyst to get the resin to harden. I tried everything too (heat lamps, kept it in the vacuum bag all day (like 9 hours)) and by night, I had to throw the wet carbon in the trash.
Today, its the same temperature outside, but I added about 5 times the amount of suggested catalyst, brought it into the garage, with a heatlamp on it again, and this time I think its going to work. I've taken it out of the vacuum bag and into the house where I think its going to dry and cure just fine. Basically, you cant take it out of the vacuum until the resin sets enough to hold the shape of the mold.
Another tricky point of the process was finding a tube that would slip over the brake post for the cantilever to pivot on. This had to be just the right size or else there would be major play in the brakes. I tried a lot of things, plastic spacers, premade fiberglass/carbon tubes, brass bullet casings, and even considered making my own carbon tube. Before I found a brass tube at my local Ace hardware store that had the perfect internal diameter.
I am going to also be making the end nuts I believe. I could buy the Empella nuts, they are $20 for a complete bike (not a bad price) but they are sold out at the present time, we'll see. The brake arm made currently weighs 12 grams without brake pads.
Tuesday, February 14, 2006
Light Bike #5 got lighter...
Lou got his Colnago down about a 1/2 pound with a new wheelset, check it out here.
Monday, February 13, 2006
Lightweight Wheel magnets for your cyclocross bike
Okay, so dont flip out yet, youre wondering how much weight can be saved with wheel magnets, just a dumn little part that doesnt need any examination right? Well, I think you might be surprised.
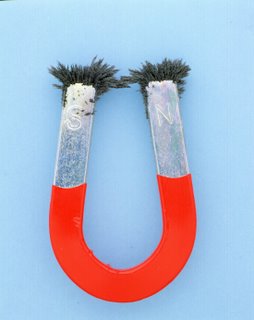
I had this wheel magnet on my bike at first
And thought there might be a better option out there, so i did some hunting. I found what I was looking for an an unsual place to find bike parts, Radioshack. They had these tiny rare earth magnets, sold in packs of 2, for only $1.98.
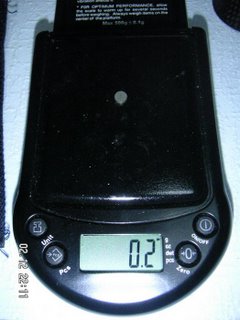
So I bought them. Upon weighing one on my tenth gram scale, they weigh in at only .2 grams a piece.
A weight savings of 12.9 grams for only $1. Also, this weight savings comes at a crucial area, rotational weight. Remember, in an earlier post I mentioned that $2 a gram is the upper limit on what you'll want to spend to lighten your bike. Well, this upgrade cost only 8 cents a gram. The only catch is, like the Tune magnet that sells out there, you gotta glue this onto your spoke with some 2 part epoxy. Now this really isnt a big deal. A little 2 part epoxy, and 15 minutes later you got a magnet permanently mounted on your wheel. Make sure to read your computers directions to see how high up the spokes they recommend the magnet to be mounted. Lastly, yes the epoxy will bump the weight a gram or so, but still, thats a good dollar to gram weight saver. And for those that dont think 12.9 grams will make any difference, thats why your bike is so heavy, big weight gains can be made through the examination of every part on your bike and thinking of how this one part could weigh just a little less.
Sunday, February 12, 2006
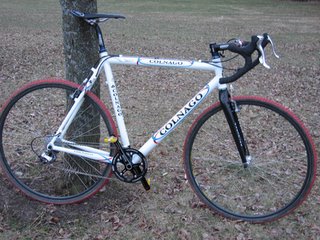
Light Cyclocross Bike #8: Chris' Colnago
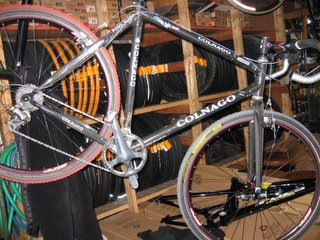
The second Colnago up on the site, this one's scandium. Just making the weight mark, but take a look at the frame size, so thats pretty impressive Chris, good work.
Frame: Colnago Scandium Cross 60cm
Fork: Colnago Cross
Headset: Chris King 1-1/8, blue
Stem: Ritchey WCS 120mm
Bar: Ritchey WCS 44cm
Shifter Right: Dura Ace 7800
Brake lever left: Cane Creek
Wheels: Mavic Reflex Ceramic laced to Dura Ace hubs, 32 spoke
Tires: Tufo Elites
Crank: Truvativ Rouleur Cyclocross 175mm with FSA 44-tooth ring and Salsa ring guard
BB: Truvativ Giga X Pipe
Pedals: Crank Bros Candy C (stolen from my wife -- I will run Candy ti or Candy sl in colors that match the frame for races)
Chain: SRAM PC-89R Hollow Pin
Cassette: SRAM PC-970 12-26
Rear Derailleur: Dura Ace 7800
Brakes: Avid Shorty 6 with Avid Tri Dangles
Seatpost: Ritchey WCS
Saddle: Selle San Marco Aspide
Total weight: 17.6lbs/8.03kg
Pedals should take off another 50 grams ... not bad for a 60cm frame!
Chris said, "Here are the specs -- big thanks to Lou Kuhn (see his Colnago C-50, Light Bike #5) for the advice and support, and for the awesome build he did as owner and head mechanic at The Pony Shop in Evanston, Illinois. Also thanks to SRAM for being a great sponsor of my road team."
Take a look at Chris's blog where he talks about cyclocross stuff as well at www.cstrout.blogspot.com
The adventures of getting my new cross frame
So, the FedEx online tracking showed that my bike frame had made it into Sacramento from Los Angeles on Firday morning at 4:38am and that the package was scheduled for delivery that day. Because FedEx wont leave a package for you at your door, I chose to wait around all day for it to arrive. My large bedroom window looks out on the street and driveway below and I opened the plantation style shutters so that I could see the big white truck pull up when my new cyclocross frame arrived. Throughout the day, whenever a large truck drove past my house I looked excitedly over my shoulder to see if this time it really was my bike that was finally here, but it never was. I checked the online tracking several times that day making sure that it was still on its way. Then, when I checked again a little after 5p, their website said that the driver attempted to make a delivery, but that I was not home. What? I had been home all day long, I had put off doing errands that I needed to get done, just because I didnt want to miss this, my doorbell works very well, and my window was wide open so I could hear anything that sounded like a FedEx truck outside. I called the customer service hotline and asked them what the deal was, and he said that they had tried to deliver it but I wasnt home, and I , not so calmly, told him what I just wrote above---I've been home all the damn day waiting for this stupid box to arrive. I walked downstairs and outside, and asked, "isnt the driver supposed to leave a door tag if he tried to deliver and im not home?"
"Yes" said the customer service guy. "Well he didnt, there's no door tag here" And thats when I realized that the guy never showed. Maybe he wanted to get off early this friday, maybe he was drinking a beer with his buddies, but whatever he was doing, he hadnt tried to deliver my package. The CS guy told me there was nothing he could do and that it they would deliver it tomorrow and I hung up. Dissatisfied with the answers I got from him, I called back. I was thinking maybe I could go right now or early in the morning to pick up my box in person and not rely on a shotty incompetent FedEx driver. When calling back, the woman at customer service informed me that she would give a note to the driver to not deliver it so that I could pick it up, but she assured me that he wouldnt get this note in time, he would still try and deliver and that I could pick my frame up on Tuesday. Tuesday! WTF! It took 2 days ti get from Los Angeles to Sacramento (a 7 hour car ride) but its going to take 4 days to get from Sacramento to my hands? Fine, I'll live with that.
I spent the night at my girlfriend's house on friday night and drove back to my place at 9am the next morning, as I was about 5 blocks from my house, I saw a FedEx truck going to opposite direction. No! I figured he already tried to deliver it and no one was home. So i jammed it back to my house, flew up and into the driveway, ripped the door tag off of the door, hopped back into my car and drove speedily through the neighborhood as if I was trying to find a lost dog in order to catch the FedEx truck and get my bike frame. Finally, I saw the truck pulled over at the side of the road about 1 half mile away from my house, and I got my new cyclocross frame. And, as you'll see in a later post, it was well worth it.
Friday, February 10, 2006
Light Cyclocross Bike: #7 Brian's Specialized
Brian built up a pretty sweet Specialized TriCross and got the weight at 16.13 lbs/7.32 kg.
Frame: 2006 Specialized S-Works Tricross 52cm (1450 grams with seatcollar and headset bearings)
Fork: Ritchey WCS Carbon Cross
Brakes: SRP Mr Grumpy
Wheels: Mavic SSL tubular
Tires: Tufo Flexus
Stem: Easton EC70
Hbar: Specialized Sworks SL
Tape: Fizik microtape
Shifters: Rear Dura Ace 9spd
Brake: Left Dura Ace old school
Cables: XTR
Cassette: Dura Ace 12-27
Seatpost:Easton EC90
Saddle: Specialized Toupe
Cranks: Dura Ace 7800
Ring: Dura Ace 41T
Guard: FSA Carbon guard.
Chain: SRAM PC91HP
Pedals: Eggbeater Triple Ti
weight: 16.13lbs
If you have a sub 18lb (8.16 kg) cyclocross bike, email it to me at
Tuesday, February 07, 2006
Paper build of my Specialized Tricross
So, as mentioned earlier, I bought the Specialized TriCross frame. My build is below. Im not sure if the final weight is right or not, but its saying that it should come under 16 lbs and thats unexpected. Although, I'm not sure exactly what the frame weighs. Someone posted a weight for it on weight weenies, but I dont remember what size there's was or if it included the headset. We'll see, I should have the frame in a couple of days and that'll pretty much clinch what the final build weight of the bike will be.
A-head cap & bolt:Homemade carbon 5
Bottle Cage:none 0
Bottle Cage bolts:plastic plugs 0.5
Bottom Bracket:Am Classic split ring 113mm 154
Brake Levers:Modolo Krono 65
Brakes: Paul Neo Retro and Touring canti 266
Cables: powercord and Jagwire 80
Cassette:DA 12/27 178.6
Chain:KMC 9sl 240
Crankset:
*Crankarms:FSA Superlight 355
*Chain rings:42 t plus FSA carbon chain guard 78
*Chainring bolts:al 11
*Crank fixing bolts:al 18
Computer:sigma 1200 37
Derlr (Front):NGear tuned 26
Derlr (Rear):DA tuned 193
Fork:Woundup 595
Frame:Specialized TriCross 1450
Handlebar:3t prima 199 195
Handlebar tape:Deda 40
Headset: 0
Headset Spacers:carbon 20
Pedals: Eggbeater triple ti 184
Quick Releases: Control tech bolt on 51
Seat Binder:stock tuned 14
Seat:Flite tt 179
Seatpost:Thomson elite 227
Shifters:Ultegra STI 246
Stem:Syntace F99 100
Tire (Front):Tufo LPS 312
Tire (Rear):Tufo LPS 315
Tubes: none
Wheelset:
front:Hershey hub/SUN M19AII 712
rear:AmClassic/Matrix ISO 863
Total 7210.1 Grams
15.90 Pounds
Monday, February 06, 2006
Weight savings tips for your cyclocross bike
So, whereas in an earlier post I mentioned that drilling your derailleur isnt going to turn your behemoth cyclocross bike into a lightweight wonder, it could help you drop that last 1/4 to 1/2 pound off your already light rig, and it might not cost you a ton of money either.
Covered in this post will be bolt tuning as well as switching out some common but heavier items in favor of something else. One caveat to everything about reducing weight is that durable and tough bikes are faster bikes than light bikes that break. Cause you gotta finish a race, and even if you have a backup bike, it probably wont break right at the pit. And obviously, durable AND light bikes are most desirable.
Bolt tuning refers to replacing heavy steel bolts with lighter aluminum or titanium bolts. The main reason why a stock bike or stock components come with steel bolts is that steel is much cheaper than titanium and slightly cheaper than aluminum. For the most part, you dont need steel bolts anywhere on your bike. Titanium is a lighter (however, costlier) option. And there are only two places where you need the strength of titanium rather than aluminum, thats the stem bolts and the seatpost (also I've never had good luck with aluminum brake cable stop or derailleur cable bolts). Aluminum is a great material for many bolts on your bike, because its lighter than ti or steel, and cheaper than titanium (also it comes in rad colors). Places where aluminum bolts are good are:
cantilever brake mounts
derailleur pulley bolts
chainring bolts
bottom bracket bolts
water bottle mount (see more info below on plastic plugs)
I've taken some pictures of these items on gram scale to show how much weight can be saved from switching from steel to aluminum or ti (Blogger isnt letting me load anymore pictures than those below).
First lets look at water bottle bolts.
A pair of steel waterbottle bolts weigh in at 6.5 grams.
The aluminum equivalent weighs over 4 grams lighter at 2.3 grams.
And heres the lightest and even the cheapest option. Plastic plugs weigh in at .4 grams and cost me 50 cents at my local hardware store. They only come in white, but if you wanted, you could spray them black or whatever color you wanted really.
Item | Steel | Aluminum | ||||||||||
Water bottle | 6.5 | 2.3 | ||||||||||
Stem bolts | 19.7 | 11 (not aluminum though--ti) | ||||||||||
chainring | 26.2 | 10.3 | ||||||||||
bottom bracket | 36.9 | 18.2 | ||||||||||
Some other light choices are:
Carbon steering tube spacers save 2.8 grams per 10 mm over aluminum.
My Chris King topcap with steel bolt weighs 17.3 grams. You could either replace the steel bolt with an aluminum one, but a cheaper and lighter option would be to put a beer bottle cap (2.2 grams) in its place or a carbon topcap that presses into place (like those made by Schmolke---but you can make these at home fairly easily)
Lastly, instead of using a front cable hanger (30.3 grams) that you'll find on 99.5% of all cyclocross bikes out there. Use a rear cable hanger (4.2 grams after i "tuned" it a bit) thats bolted onto the stem's faceplate.
So let me get out the calculator and do some math on how much weight we saved:
-12.2 grams for the waterbottle mount (ill assume you have two of them)
-8.7 grams for the ti stem bolts
-15.9 grams for chainring bolts
-18.7 grams for the bottom bracket bolts
-15.1 grams for the Topcap switch
-26.1 grams for the front cable hanger
-11.2 grams for the carbon spacers (assuming you have 40mm of spacers)
=107.9 grams.
And I didnt even include the aluminum cantilever brake mount bolts (which might be another 20 grams) That brings you to 1/4 pound lighter. So, if youre out of options or dont want to throw down several hundred dollars for a lighter component, some small upgrades like those above can actually make a difference. And some of the options above are almost free.
Saturday, February 04, 2006
Just bought my new cyclocross frame
So I've been scouring ebay for the past few weeks, trying to find a new frame that was going to be my new "race" frame for next season and beyond. Originally, I wanted a frame that was identical to my 2001 Specialized. But then once i broke her down and realized that it wasnt the weight weenie frame I had hoped for, I decided to look for a match to my 2004 Trek XO1 frame. When I got outbid on that identical frame I was a little pissed, but then again, I couldnt rationalize spending $400 on a 2 year old used frame, no matter how similiar it was to my current one. In several posts ago, I mentioned that I really wanted the new Specialized S works cross frame but didnt want to pony $1100 for it. Well, one came up on Ebay a couple days ago in my size and after I sold a number of things on there in the past week, I had the cash to pull the trigger on it. I think its going to be a pretty sweet rig once I get her built up. It might take a little longer than planned to actually get this built now, because I just spent my wad (remember, I'm currently not employed). Is it madness to spend $700 on a bike frame when you dont have a job? Maybe. But I had $640 in my paypal account, so doesnt that count for something? I sure hope so.
Friday, February 03, 2006
Light Cyclocross Bike #6: Dave's K2 proto
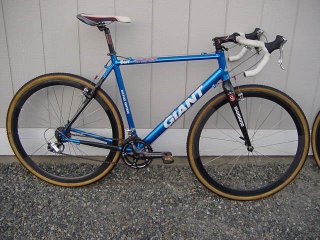
Numero Seis is Dave's "Giant" cyclocross bike, Dave says, "its a prototype K2 frame that we (i used to work at K2) made for Jonny Sundt. never hit production. My team is sponsored by giant so thats why the Giant decals. :)" Pretty cool. BTW, whatever happened to Sundt?
Frame- Kinesis prototype K2, Kinesium tubing w/ carbon seat stay, 56/56
Fork- Alpha Q
Wheels- Zipp 303
Tires- Challenge Grifo 34'
QR- Mavic
BB- FSA Isis Ti
Cranks-FSA Carbon Pro 38/46 w/ 3rd eye (recently replaced w/ new Dura Ace)
Pedals- Time Atac carbon Ti
Brakes- Spooky w/ Ti bolts
Empella chicken levers (being removed for next season)
Brakepads- Koolstop black
F Der.- Dura Ace
RDer.- Dura Ace
Shifters- Dura Ace (R) Ultegra (L) 9spd
Cassette- Dura Ace 12-27
Bars- FSA RD 200 44's
Bartape- Deda
Seatpost- FSA SLK
Saddle- FSA (San Marco Era design)
Stem- FSA OS 115
Headset- Cane Creek IS integrated w/ carbon spacers
Total weight: 17.8 lbs/8.07 kg
This bike/frame probably has another full season or two in it & I think our team deal with Giant may be ending. So, next year will probably bring new paint & new decals for whatever bike manufacturer we get. These frames handle & ride like no other so I'll be on them until they break or wear out. :)
~Dave~
RBR DPCX
Thursday, February 02, 2006
Light Cyclocross Bike #5: Lou's Colnago C50
Light Bike #5 is Lou Kuhn’s Colnago C50 carbon bike. Colnago carbon outfitted with full Dura Ace is a pretty sweet combo. Check out the pics to get a closer look.
Edit: 2/14/06: Lou's lightened his rig to under 16 lbs with a new wheelset.
Frame: Colnago C50 cross 58cm
Fork: Colnago cross
Headset: Chris King 1 1/8
Stem: FSA 0S115 120mm
Bar: Easton EC90 Carbon 44cm
Shifter Right: Dura Ace 7800
Brake lever left: Cane Creek
Wheels: Zipp 202 rims 32 hole, DT 240 hubs, Revolution spokes, tied and soldered.
Tires: Tufo Elites
Crank: Dura Ace 7800 175mm with DA 42 tooth ring and FSA Carbon Ring guard
BB: Dura Ace 7800
Rear Derailleur: Dura Ace 7800
Chain: Dura Ace 7800
Cassette: Dura Ace 12-27
Brakes: Paul's Neo Retro Cantis with Avid Tri Dangles
Seatpost: USE Alien Carbon
Saddle: Fizik Arione
Total weight: 15.98 lbs
If you have a sub 18lb (8.16 kg) cyclocross bike, email it to me at
Wednesday, February 01, 2006
Some basic weight shedding principles...
So you wanna know more about dropping a little more weight on your Cyclocross bike? The following are some basic principles for doing just that.
There's a phrase that goes "penny wise and pound foolish." I think it could be changed to "gram wise and kilogram foolish" for the weight "weenie" subculture. The idea that youre going to shed tons of weight off your bike by drilling holes in your derailleur isn't the most brilliant idea (btw you'll only lose like 3-7 grams, ive done it). The real truth is that yes the grams matter but not if your riding a steel bike where the frame and fork alone add up to 8 pounds. (Steel frame lovers dont attack me, there are a lot of great reasons to ride a steel frame, but lightweight isnt one of them). Youre going to have to examine how much money you have to spend on the purging project, establish a goal for the ideal weight of your bike and then start doing some research on what can be lightened and what the payoff is (in terms of grams).
First off some basics:
1. There's 453.6 grams per pound.
2. The general consensus is to not spend more than $2 per gram to lose weight.
For example, my WoundUp CX carbon fork weighs 592 grams (on the heavy end for "light" carbon cyclocross forks), whereas a stock Aluminum CX fork that came on my Trek X01 was 852 grams (cut at 8.25 inches). That's 260 grams or over a half pound shaved, that's a
lot. The fork cost me $200 used. Anytime your spending less than a dollar a gram, you're doing pretty good. In the beginning of your quest, this will be easier than it is when your bike begins to approach your "goal weight".
If you're really serious about building up a light bike and already have a bike to begin with, one common method is to strip the bike down so every part is lying on the floor and weigh each part with a gram scale. You can purchase these from kitchen stores or office stores. It would be ideal to buy a gram scale with 10 pounds as the max capacity. If you don't want to strip your bike down, at least make a list of all the parts on your bike and then go to Weight Weenies to calculate what that part weighs in reality. Don't rely on manufacturers claimed weights as they are rarely accurate and often much heavier. When you have this list, you'll need to compare your items to what I'd call "dream items". "Dream items" might be way out of your budget, but they show you what an item could weigh at its minimum. You can find these "dream item" weights by looking at some of the bling light bikes on this website. You might not have the money to spend $1000-$2000 for a set of wheels, but by looking at what a pair of Reynolds Stratus DV wheels weigh you can compare your own wheelset to that number.
After you compare your items to the "dream items" it should be slightly obvious which items should be first to be replaced. For example if your wheelset weighs 2500 grams, you might want to drop some coin on a lighter set.
You can determine which components to be putting back on your bike by visiting the Roadbikereview CX forum as well as the Weight Weenies forum. There, you can do a search for the item youre thinking about purchasing and seeing what others have said about it in the past.
Issues to consider are how well it works, durability, customer service of the company selling/producing item etc. In the coming days, I will add articles on site about some specific
components that are lightweight that can be used in the cyclo-cross races. Until then, go ride.
photo courtesy of http://www.velo-retro.com/spivey1.html
Syntace Recall F99 Stem
Just in case you missed this (as I did), Syntace has recalled a number of their F99 stems. They are telling folks to cut their f99's in half after they receive the replacements and to stop riding if you have a recalled stem The way to tell is, theres a production code on the back of the stem, by the steerer tube bolts. If its not there, or less than or equal to 45 04 then you need to send it back. Full information seen here on the Syntace site. Or here on the consumer affairs website.
Just got off the phone with Syntace USA and they said I should see my new stems in 5 days.
Subscribe to:
Posts (Atom)