Friday, May 26, 2006

Last Chris Kelly frame auction


Just like it sounds, Chris Kelly is calling it quits and is auctioning off the last Chris Kelly frame to ever be made. The winner will assist Chris in making this final frame. The package includes helping Chris make a custom frame for you in his shop in Nevada City California. Airfare, and hotel accomodations are paid for. Also you get a VIP pass to the Nevada City Classic bicycle race as well as some other stuff. Sounds like a sweet deal, someone bid on it and make sure its a cross bike!

Wednesday, May 24, 2006

LightWeight Cross bike #14: Ty's Derosa Cross Carbon


Well, I wasnt going to skip the number 13, but seeing as how Ty didnt need any more bad luck when it came to cross bikes, I did it anyways.

Like the Phoenix being reborn and rising from the ashes, this De Rosa kicks some ass. Nice build Ty.


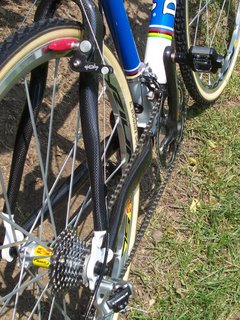
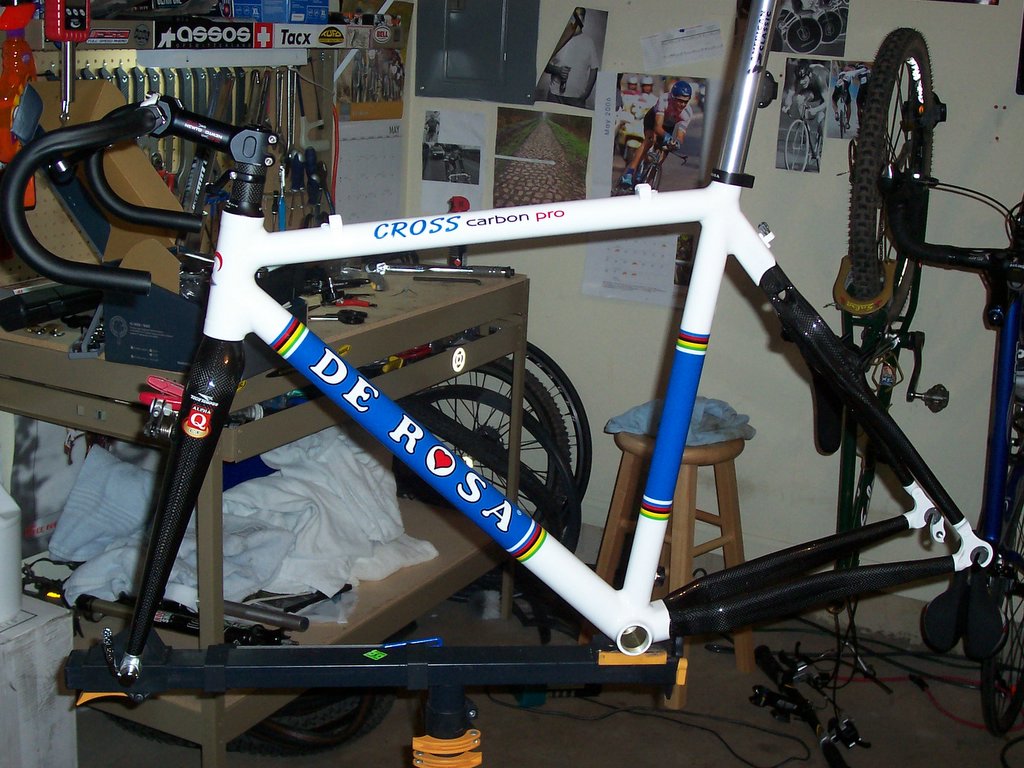
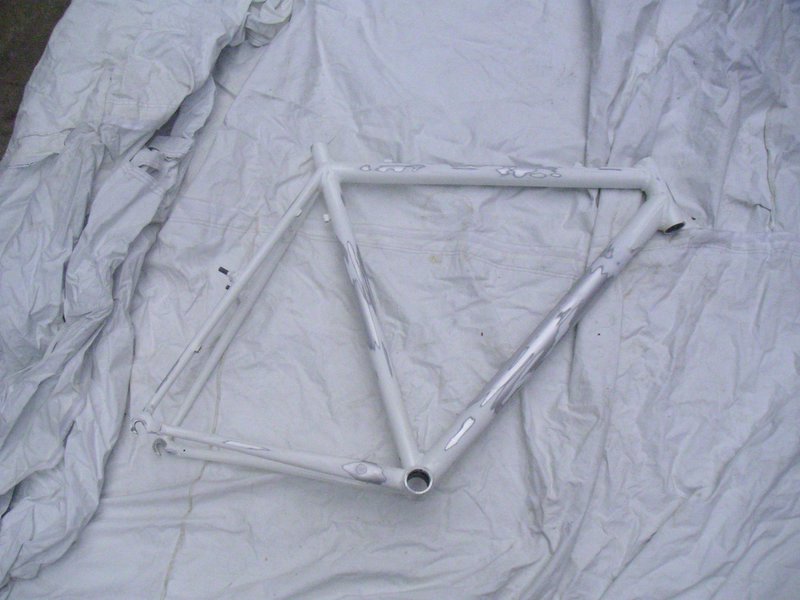
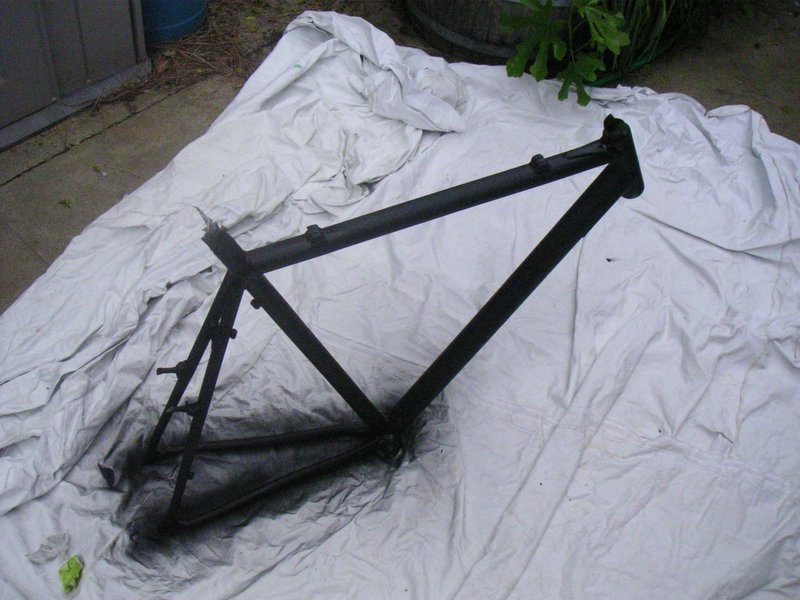
Frame: Derosa Carbon Cross pro, half carbon, half deda alum.
Fork: Alpha Q cx fork
Headset: Campagnolo record hiddenset
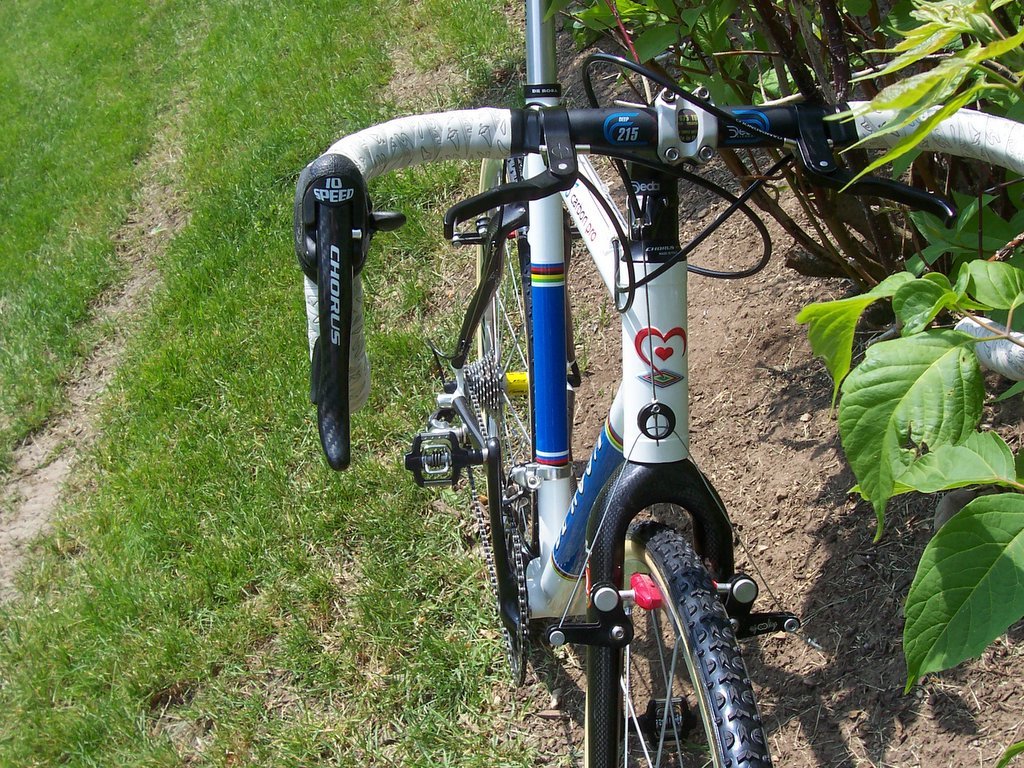
Stem: Deda 26.0 newton
Handlebar: Deda 215 44cm deep belgium drop
cross levers: sniper cx levers
Shifters: Campagnolo Chorus Ergopower 10-speed
Ribbon:salsa rubberized cork grey
Cables: Campagnolo (black)
Front derailleur: -Campagnolo record compact
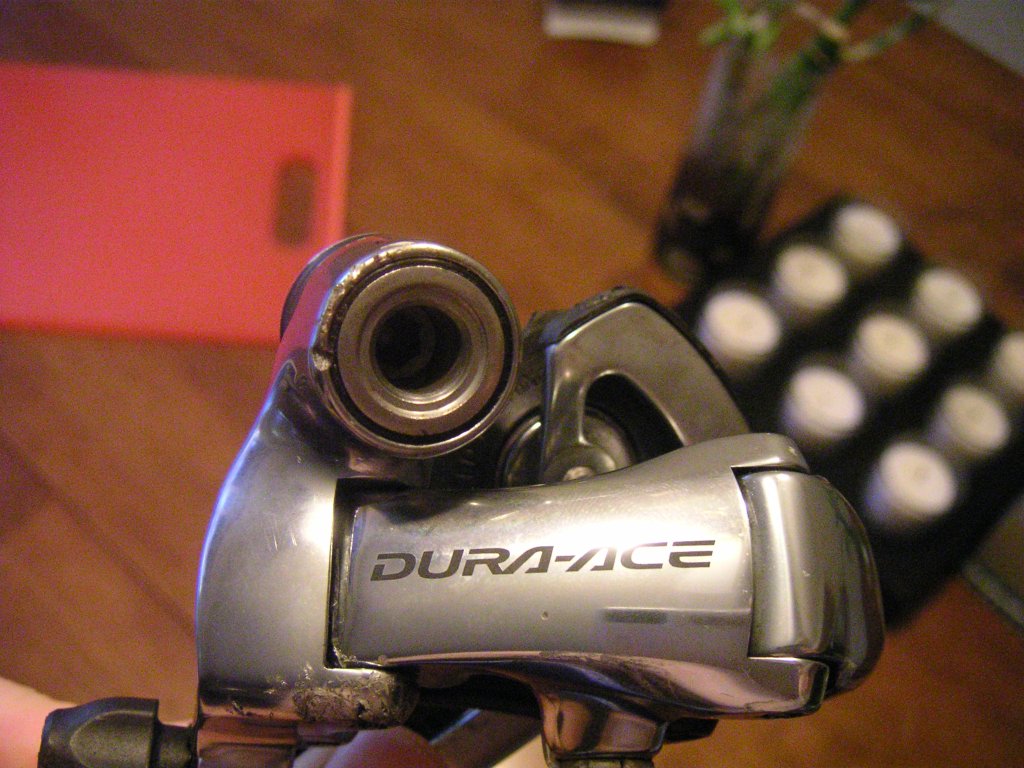
Rear derailleur: Campagnolo Chorus 10-speed (short cage)
Chain: Campagnolo ultra C-10
Cassette: Campagnolo Record 12-27 titanium
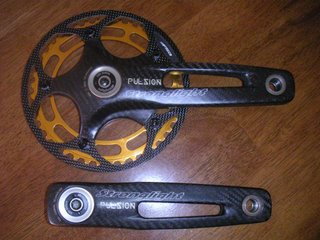
Crankset: FSA KForce cross
Bottom bracket: FSA ceramic mega exo
Brakes: Spooky cantilevers w/ kool stop ceramic pads
Pedals: Crank Bros titanium Candys
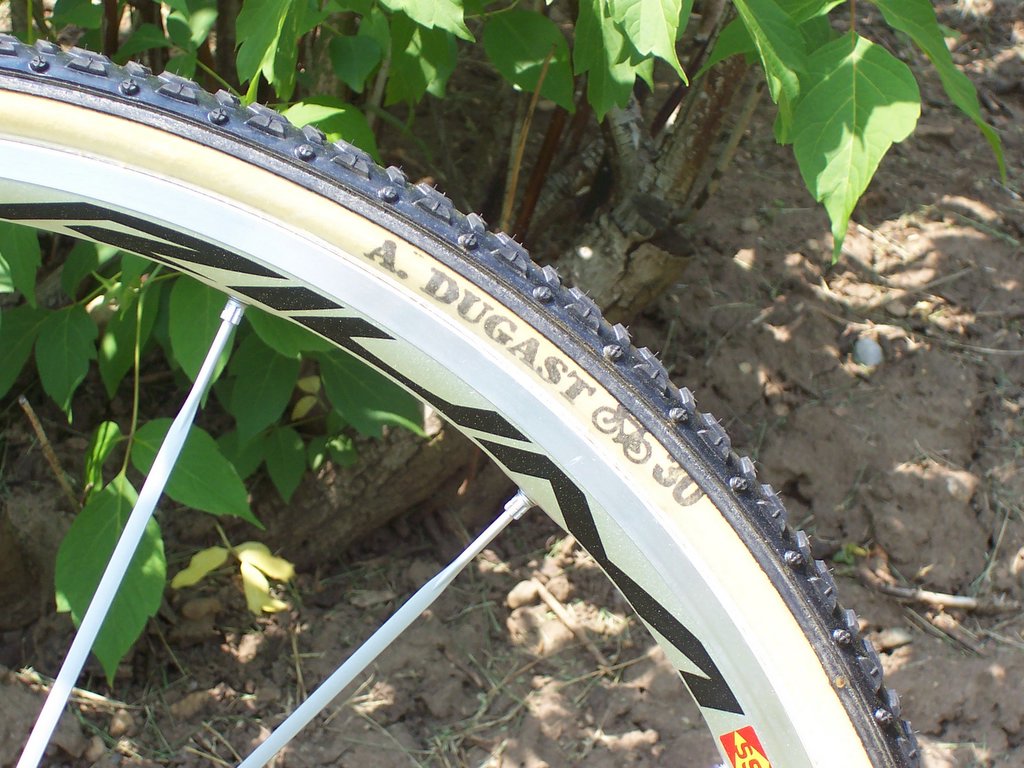
Wheels: 2006 Mavic Ksyriums SL tubulars
Tubes: AhHH!! Dugast typhoon Nectar of the gods!!!
Seatpost:Titanium American classic
Saddle: Selle Italia SLR (black)

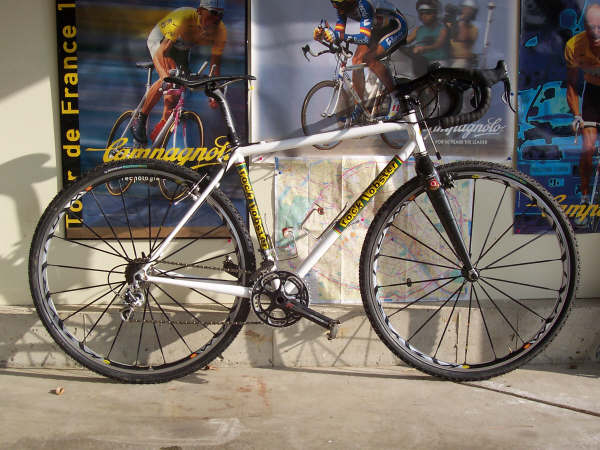
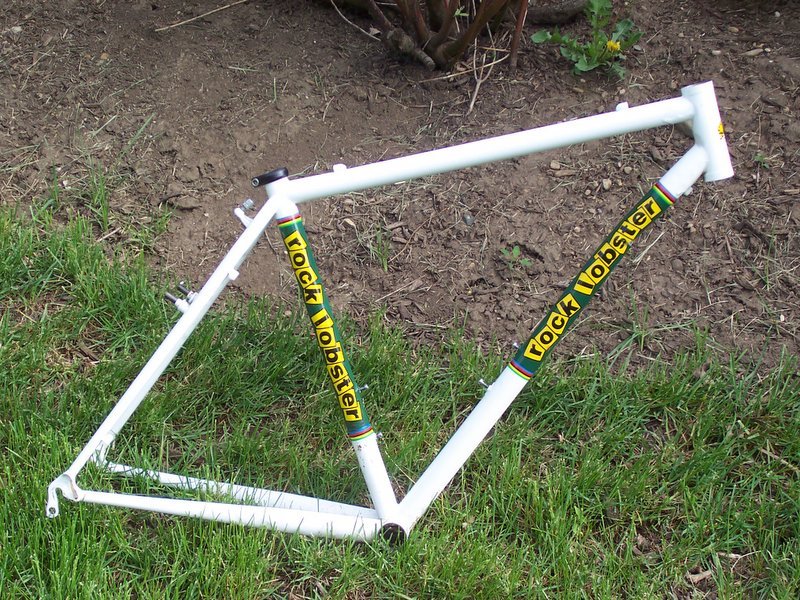
Ty wrote: "I finally finished the bike, I had to hunt down the dugast like the holy grail! The frame is awesome! Super agile, and responsive, and no braze on water bottle bolts that dig in your shoulder! According to Gian Lucca of Albabici importers you are the distributers of derosa in the usa, says that there are only three of these frames in the usa. I had seen the frame at interbike last year and loved it! I ordered on about four months later and was custom made for my measurements. The wait time was about 4 months which wasnt to bad, but came in the right time after my lobster was crushed! I have another older set of mavic ksyriums with tufo tubular clinchers for training so I dont wear down the "gucci" dugasts!
I bike was around 16.44, but I forgot to put on my sigma bc 1200 computer!
thanks again for the kick ass website! Ty"

Very cool bike, I love some of the detail in that rear carbon stay. Also, the bike is super light without being crazy. Looks like the choice of parts was focused on both lightweight and durability. Nice work!

Tuesday, May 23, 2006

Were now dot com!


So the inevitable happened. The name of the site is now www.plusonelap.com. You dont need to type the .blogspot.com (although doing so will still work) anymore.

All the other extensions of this site ( the Market, LightWeight Gallery, Handbuilt Gallery, etc) still use the same .blogspot.com address.

Just making it easier to enjoy one of your new favorite cyclocross spaces on the internet.

Monday, May 22, 2006

Race organizers: List your cross series here!


Calling all cyclocross race directors---Plus One Lap is getting geared up for the 2006 cyclocross season. List your cross race, series or training camp on Plus One Lap for free.

Approaching the 2006 season, Plus One Lap will be the source in the USA to find out when races are occuring. We are National. Pacific Northwest? Boston? Florida? No matter what the location, Plus One Lap is accepting all pertinent information about those cross races, which will be posted for free.

We will also feature the results of these races as well.

Stay tuned for the National 2006 Cross Calendar...

Sunday, May 21, 2006

Failing the bunnyhop...


Here's a great example of what can happen if you try to do a bunnyhop and dont make it.


Before

Ty reported: "The lobster was a reynolds 853 steel that was built by paul sadoff, I used to sell campagnolo components to him when I was with ochsner international. The damage was caused when I tried to bunny hop a barrier when I was practincing a cross course. As you can see I failed. I dont know if it can be repaired, the steer tube is bent as well as the down tube. I am going to start on my derosa tommorrow morning. thanks ty"

Last time I practiced bunnyhopping, I tried jumping a cement barrier, and didnt get my rear wheel over it, and it broke my rear rim. Unfortunately for Ty, his damage was much worse than just a rear rim.


After

Looking forward to seeing that Derosa though...

Friday, May 19, 2006

Dont Laugh (the sub $100 cross bike) pt 4


Well, don’t worry, I know this bike isn’t finished yet. This is the deal though, getting things for cheap usually means not fast. It means waiting, making deals, searching forums and online auction sites, until you find that part that will fit your needs. Instantaneous=Expensive. Cheap=Patience.

So what’s happened since the last time I updated you on the “don’t laugh” project? I spent big dollars and bought a blue seatpost ($20). Also, I traded a Cinelli alter stem for the Shimano 600 cranks. I found a matching set of brake levers in my Rubbermaid parts box. They are non-aero, but hey this bike isn’t new, lets stick with a theme eh? Oh and probably coolest of them all, a nice reader sent me a set of Suntour Power 6 speed Barcons.

Whats left? I have to buy some brake and derailleur cables then hook up the brakes and rear derailleur. Get a new tube for the rear wheel. Swap out the 7 speed freewheel with a 6 speed version. Wrap the handlebars with some cool blue Benotto handlebar tape that I just happened to have stashed away and which just happen to match this bike perfectly. Get a new chain. Oh and I’ll probably take off the spoke guard on the rear wheel and the reflectors off the bike.

Lastly, the bike has only cost $94 thus far. Looks like I’m going to go over a little, but not by too much.

The previous posts in this series are here.


Lets not forget what it looked like when I bought it:

Thursday, May 18, 2006

Got me some Stronglight Pulsions!


Look up bling in the urban dictionary and you might see a picture of these Stronglight Pulsion cranks. I just received these today from Molly Cameron at Veloshop in Portland.

I was originally going to be sporting a pair of FSA Superlights on my ethereal Tricross. But these weigh 36 grams less than the FSA Superlights and they look like they’ve been soaked in bling juice and then painted with pure sex.

The crankset as shown comes in at 419 grams:

Stronglight 130 BCD ISIS (including BB bolts) 337 grams
41t gold chainring 51 grams
FSA alloy chainring bolts 10 grams
FSA carbon chainring guard 21 grams


I’ve read that these cranks are extremely stiff as well as being super light as well. Although there have been some pics floating around on weightweenies that these things fall apart, I’ll take my chances with them.

Hopefully, I can get my bike built soon. I still need a fork. So if anyone has one they can sell me or cut me a deal on one for some free ad space on this site (Easton, 4za, Alpha Q) drop me an email and we’ll work something out.

What do you guys think of the cranks?

Some of my latest used buys


Thought I'd share what I've picked up on the used market lately. I think I got pretty good prices all the way around.

First off, I got a set of Control Tech titanium bolt on skewers off of Ebay for $8. Retail: $35 or so Weight: 48 grams


From the same seller, I got a Deda 215 Deep (non anatomic) bar for $20.00. Retail: around $70 weight: 241 grams.


Also from the same seller (I got shipping combined) a set of Suntour Downtube shifters for only $4. Retail: no longer made but DT shifters on ebay usually go for at least 3 times this price. Weight: 54 grams.


Lastly, I got this slightly banged up Dura Ace 9 speed rear derailleur for $15 shipped. It came with a funky backplate that I will swap out, maybe with a carbon model. I'm going to tune it some, drill it up, dremel it, because it was only $15 shipped. Retail: around $50 or so for this condition Weight: 178 grams.


Just goes to show that deals are out there, you just gotta be at the right webpage at that right time.

Oh, soon I'll have a pretty set of Stronglight Pulsions in my grubby little paws. Theyre going to look great on my TriCross, if I ever get it built...

Monday, May 15, 2006

Custom Cross #4: Frank's RockLobster


The 4th bike to hit the customs gallery and the 2nd RockLobster is my friend, Frank's, Orange Rocklobster. For a size 60c bike in steel this is a really nice weight cross bike. Good job mate.


Here, finally are the pics (attached) and specs of my cross bike. I can't wait to see it up on your page.

Frame: Rock Lobster custom, 60cm, 853 main tubes
Fork: Easton EC90X full carbon, 260mm steerer
Headset: Chris King
Crankset: FSA Energy compact, 48-34 rings
Bottom Bracket: KCNC Ti ISIS 68x108 (thanks jeremyb)
Brakes: Paul Neo-Retro front, Touring rear, aluminum pivot bolts
Top Mount Levers: Empella
STI Levers: Shimano Ultegra
Front Derailleur: Ultegra
Rear Derailleur: Ultegra
Cassette: Shimano Dura Ace 12-23 9 speed
Chain: SRAM 970
Seatpost: Performance Forte Precision carbon (I know, sketchy)
Seatpost Clamp: DKG with Ti bolt
Saddle: Selle Italia SLR XP
Handlebars: TTT Prima 199 44cm
Stem: Syntace F99 120mm, Ti bolts
Bar Tape: Cinelli cork
Cables & Housing: Shimano
Pedals: Time ATAC XS
Wheels:
Front - Sun Mistral tubie on ?? hub, 14/15/14 spokes radial (will be rebuilt)
Rear - Sun M19A-II tubie on Dura Ace hub, 14/15/14 spokes radial / 3x
Tires: TUFO Prestige 30mm
Skewers: USE Spin Stix
Other: aluminum bottle cage bolts, carbon spacers, trick Ebay straddle cable hangers, StayWrap chainstay protector, Vetta V-100 wireless computer

Current weight on my el-cheapo digital scale = 19.04 pounds. It WILL get under 19 very soon, I'll send you an update.

I have a pair of Mavic GL330 rims to build onto the existing hubs, should save a little weight there although I'll go to a 3x front lacing for durability. Feedback and comments appreciated!

Frank

Again, the bike looks great Frank, and the weight is very respectable for the size and material of the frame.


Friday, May 12, 2006

Painted my white S Works black


So, I had this 2000 era Specialized cyclocross bike that was a little beaten up. The chain had dropped mid race on a number of occasions, the paint was nicked, scratched, scuffed...the paint wasnt good. So I painted it, and the following is what I did.


First I had to choose what color I wanted to paint it. I chose matte/flat black and I wanted to put glossy black decals back on it. I went to my local hardware store and purchased one can of primer black and one can of flat black. My flat black enamel had a dry time of 4-5 hours, if I were going to do this again, make sure you get the fast
drying stuff (like 13 mins) if youre anywhere as impatient as myself.

Then, I got out the electric hand sander. If you dont have an electric hand sander, stop now and go buy one. Seriously, this project would not be good without one, almost impossible. The Specialized decals on the bike were really on there (who knew plastic decals turn into titanium after 5 years?). This was the most difficult part of the job. I spent about 2 hours with an electric sander removing the decals (note: for the "dont laugh" bike project, I learned that burning off the decals is much faster and produces better results and as a result you could get by without an electric sander). Also, from those several chain drops, the metal had been nicked a few times itself, I was able to get most of those nicks out of the frame as well, which was cool.


After the frame was sanded, I took some alcohol to it to remove the dust, oils and any dirt left on the frame. Next, I taped off the headset, BB, canti brake posts and stuffed newspaper down the seat tube. Then, I sprayed it all with the primer. Since, my final color was black, I went with a black primer. If you choose a final color thats lighter (yellow, orange, green,etc) go with a white primer, even grey primer will peek through the final paint color and alter the color you want the bike to be---ie it'll be a greyish yellow or green.

After that dried, I sprayed on the flat black enamel. The key with any spray jobs is to do a lot of light coats. With a fast drying spray paint, you can work from front to back and by the time you get done with the back you can usually go back to the front and repeat the process.


Next, I took some fishing line and tied it through the head tube, and hung the bike to dry. Letting it fully cure is a key step in the process so that it comes out looking pretty good. It's easy to chip, and leave finger prints if you start handling it or bolting parts on and the paint hasnt fully cured yet. Dont touch it until about 3 days after it stops smelling like wet paint. A week is probably a good bet.

BTW the pre paint weight was 1628 grams, after it was 1605 grams.

Im not done getting it built up but this is what I got so far:


Wednesday, May 10, 2006

New email subscription service

I was using Bloglet as my email subscription service in the past. Unfortunately it kinda sucked big time. I subscribed to my site, just to see how well it was working, and sometimes it sent out an email to notify that a new article had been posted to Plus One Lap and sometimes it didnt (mostly it didnt). So I've changed to a new email subscription service, Feedblitz.

Email subscription is much easier to use than a RSS or Atom reader (which I still might add if people want it---ie email me or comment if you would find it helpful). Basically, you subscribe to my blog using the subscribe me form on the right hand column of the page, and then whenever I post something new, you'll get an email notifying you of such. This is helpful because the site is updated randomly, therefore, you'll know when it is updated.

Hopefully, Feedblitz works better than Bloglet did.

Tuesday, May 09, 2006

Custom Cross #3: Orange Curtlo


The third custom cyclocross bike to hit the customs gallery (#2 was Josh's Light Rocklobster) is this Curtlo. A pretty cool looking bike with a purple to orange fade.


The frame and fork are True Temper OX Platinum, custom built by Doug Curtiss of Curtlo Cycles.
Headset - Cane Creek S3
Handlebar Stem - Ritchey WCS 120mm, +/- 6
Handlebar - Ritchey WCS Road Classic Bend 42 cm
Tape - Shimano Gel backed.
Computer - Cateye - Mity 8
Seat Post - Ritchey Pro
Saddle - Regal
Brakes - Shimano BR-550 Canti's
Shifters - Centaur
Crankset - Centaur Compact 50/34 172.5
Bottom Bracket - Centaur
Front Derailleur - Centaur Compact braze-on
Rear Derailleur - Centaur
Chain - Campagnolo 10
Hubs - Ultegra 10 speed compatible
Rims - Mavic MA3 laced 3 cross with black 15/15 DB spokes
Cassette - 12/25 American Classic
Tires - in the picture, Michelin Jet. Currently sporting Vredestein Campo Cross.

Bike rides like a dream, very happy with the work Doug did on this.


Friday, May 05, 2006

Custom Cross #1: Sean's Taylor


First submission to the new customs gallery is Sean's Taylor.


Sean Says: "Paul Taylor does awesome work. Here is a custom 56x56 steel frame with Alpha Q Carbon fork and Pegasus carbon seat stay. As built DA STI, front + rear derailleurs, FSA cranks, Paul cantis (neo retro front and touring rear), Mavic OP on DA hubs, Tufo tubular clinchers, Ritchey Pro post + bar, TTT Zepp stem, SLR saddle."


If you have a Custom build cross bike send it to me at

Thursday, May 04, 2006

You voted. I heard. Bring on the customs

It was a pretty one sided fight from the beginning...but the custom (no minimum weight limit) camp won the battle. So +1lap will now have a custom cyclocross bike gallery. The location is here.

Currently, its empty, but I think that'll change soon. Send me your custom bikes. We want some good photos to drool over as well as a build list as well as any other info you think we should know.

Send them to

The rules? So long as these frames were made by hand by a custom frame builder they are eligible for the +1lap Customs Gallery. There is no weight minimum, and the bike didnt necessarily have to have been made for you (you can be the 2nd or 3rd owner etc).

This should be fun.

Wednesday, May 03, 2006

A custom made bike gallery?


So I created a poll, located at the top of the front page, for you folks to vote on whether you think there should be another gallery added to this website. What I'm considering is adding a gallery just for handmade/custom cyclocross bikes from the likes of Rock Lobster, Steelman, Curtlo, Zanconato etc....


If you have an opinion vote now. Weight wont be a criteria for entering the Customs Gallery, just that it is a custom made frame.

Tuesday, May 02, 2006

Dont laugh part 3 (the paint)


Paint can really transform something ugly, into something a lot less ugly. I think the paint came out pretty good on this old bike. Its just some white primer and some Rustoleum blue paint, inside is how it went down.

The first posts in this series are here:
#1 Going to a bike auction
#2 Dont laugh
#3 My Schwinn in catalog
#4 The tear down
#5 The paint

So, first off I needed to take it to the LBS to get the cranks removed, remember? Well, heres a shout-out to MadCat Bicycles because they did the removal for free, thanks guys.

After that, I went to my local ACE hardware, this particular store carries like every spray paint color known to man, so thats really cool----they have a much larger selection than any big orange box kind of store. I narrowed the colors down to a blue, a sage green and a tractor yellow. I already have done 2 bikes in an orange/yellow theme, and the sage looked like maybe it might come out too gray, so i chose the blue. Along with that, I bought a can of white primer. total cost $4.86 (it was on sale).

Then, I bring it home, remove the bottom bracket, and everything else---bb cable guide etc. Everything that you can get off has to be off the frame, it just makes the final product better looking.

This bike had a number of decals, decals are really a large pain in the ass, they usually dont come off well at all, like at all, like they are more durable than the paint theyre attached to. So I learned a trick and burned them off with a propane torch. This worked really well, and left the decals like ash on the frame which was very easy to sand off. Next comes the sanding, you'll want to rough up all the areas of the paint, you dont actually need to take it down to bare metal, its a waste of time if the paint your spraying on is stuck on there really well and not flaking off.

Decal before----note this bike is "team issue"!


Burned decal---


Sand it down well. This bike had a lot of white overspray on it, and i wanted to get most of this off as well. After youre pretty sure you got the bike sanded down well, wipe it down with like an Alcohol product to get all the grease, oils and dust off of the frame. This also allows you to see if youve missed a spot, which I had, so I pulled out the sandpaper again and went over those spots again, thus I had to wipe down again with the alcohol.

Bike before the paint:


After that, you'll want to tape off all the threads and areas you dont want painted. Do a good job here, I made sure i covered the Schwinn headbadge well, cause I wanted that to be there after the paint was done.

Throw down a drop cloth, spray with the primer using a lot of light coats, as opposed to one or two heavy coats of paint. When that dries (about 12 mins) hit it with the final color, in this case blue.


Wait a good amount of time before touching it or trying to assemble parts to it.

And voila, this is what I got when I was done. I think she came out looking pretty good. The parts will be going back on shortly, I also have to find a number of parts still to make her complete----some massive trading is going on with others out there to get what I need.


BTW---the frame fork and headset weigh 8 lbs! Ouch heavy bike.