
I thought I'd go into greater detail on how I made these carbon
cantilever brakes. First off, it started with looking at the design
for the Empella Frogglegg brakes as well as the Paul's Neo Retros. I knew I wanted them to use V brake style pads (as opposed to the smooth post style pads that are used on the Empella brakes). The primary reason I wanted to go with V style brakes was so that I could toe in the brake pads for better adjustability as well as I thought making arms to accept the V style pads would be easier to make. My first try at making a cantilever arm came out really bad. I simply
laid carbon over a thin plywood board (8mm in width). Unfortunately, the width of the board wasnt enough space to fit a V brake pad nut into. I realized, that the area where the brake pad mounts to the arm had to be wide enough to accept a V brake pad nut (13mm) but the brake itself down where it slides onto the stud needed to be narrower (8mm) in order for the empella straddle nut to slide in place.
Back to the drawing board....
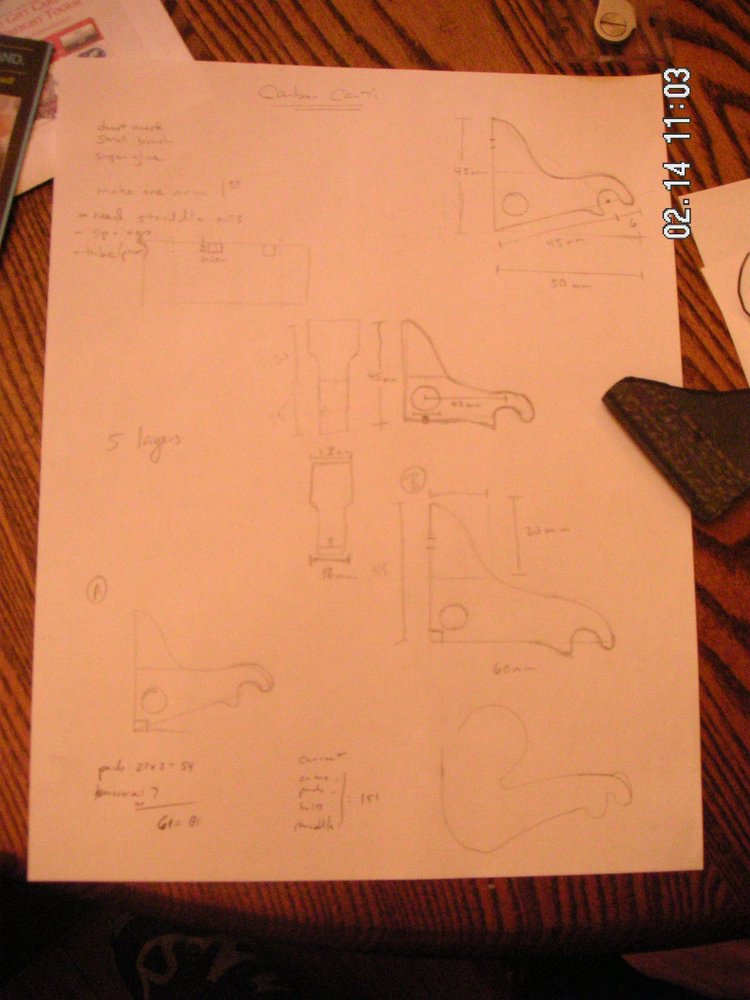
and I decided that I would take that same original board (8mm wide), and add a plastic spacer on the top to each side (2.5mm each). This would create an internal width that was what I wanted, but the end of the arm would be the correct width for the straddle nut to side into. (since this point, I think I may have come up with an even cooler design, but I am still in the drawing phase).
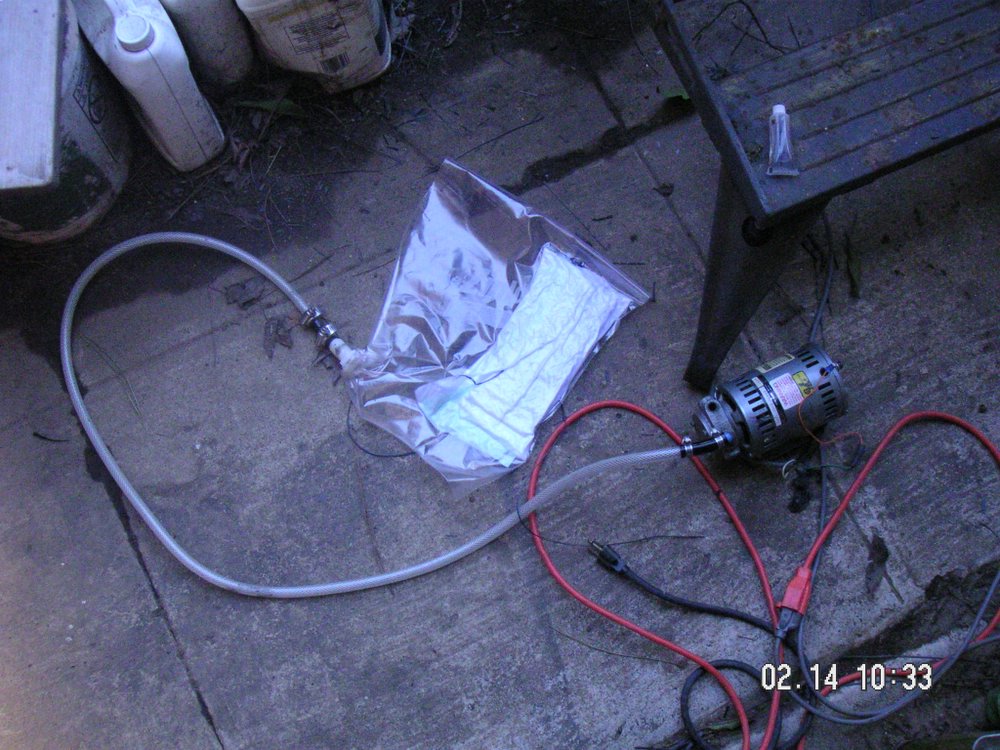
The carbon fiber that I used is 6 K 10.9 oz/sq yd and I used 5 plies of it. After the carbon is laid down over the "mold", I laid some nylon release peel ply over it so that the absorbant batting like material called "breether and bleeder" wont stick to the carbon project itself. This batting material is there to absorb any excess resin that gets pressed out of the carbon fiber (and there will be a good amount). All of this is placed inside of a vaccuum pump that has a hose coming out of it, and inserted into a gallon freezer Ziploc bag. Composite supply stores sell the attachment that connects the hose to a bag (its called a vacuum connector). Using a ziploc was a risk (as they sell "special" bags for laying up carbon) but this actually worked perfectly, and it was much cheaper.
Then, the vaccuum pump gets turned on and its like a seal a meal
system (which i've thought might actually work if you didnt want to
purchase a vaccuum pump----although I got mine at a yard sale for
about $10) and it sucks out all the air and also sucks the excess
carbon into that batting material mentioned above.
Temperature is
crucial as resin doesnt like to harden in cold temps----70 degrees F is about right. After the carbon/resin/mold are in the vaccuum bag for a couple of hours, they are removed, and the batting and release film are removed to let the carbon/resin to breathe. You'll want to remove them from the vaccuum bag only after the resin has set and is mostly dry (otherwise the carbon will lose its shape). However, I've found that once its sufficiently set, removing it from the vaccuum bag lets it breathe and dry even quicker.
This is allowed to set for a 24 hours, until its fully cured. When it no longer smells like resin, its fully cured. Removing it from the mold invloves a putty knife. Then, I got out the Dremel, and began carving out the brake arm as I had already drawn out on a sheet of paper. This is one of the most difficult and time consuming parts othis project as you'll want it to look good and you'll want each side of the arm to match each other.
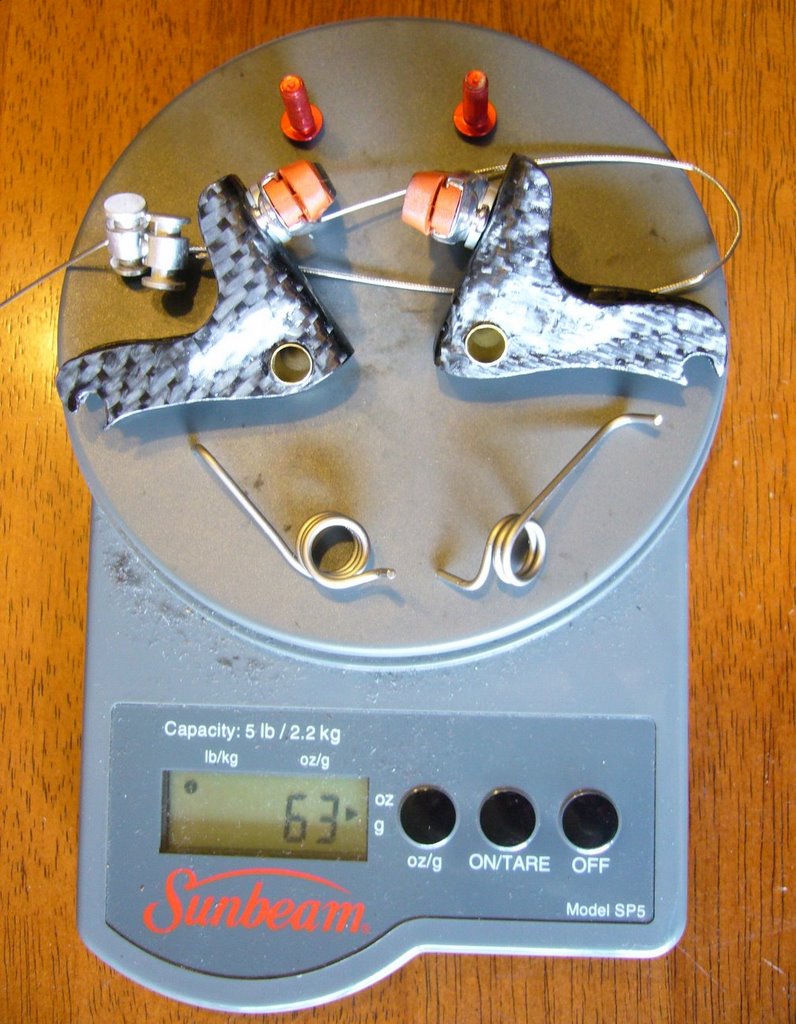
After this is done, you'll need to drill out a hole for the brake stud to slip over. Next, I bought a rod of brass tubing thats 11/32" (it should fit just perfectly over the cantilever brake stud). This tube was then epoxied into place, then a layer of UV resistant clear coat was sprayed over it. Repeat this process to make the other arm and you're done. Well done with the brake arms. I also made the springs out of titanium and tuned down the brake pads to lighten them up. I will post a more in depth look at how to make your own spring soon.
Tools I used for this project:
Dremel with accessories
Drill press
Metric calipers
Vacuum pump
putty knife
and composite supplies as mentioned in post
2 comments:
I'm happy to see that you used Kool Stop brake pads. They have been a favorite of mine for years.
Very interesting. Also congrats on the Make mag.
Post a Comment